Platinum sponsors


New Input System in Unity
Not so long ago, Unity launched a new input system, which means it’s time to take a closer look at it.
Unity is not only an actively developing but also a very actively changing product. New render pipelines, UIElements, and New Input System - these are all recent changes that must make the engine even faster, more flexible, and friendly. History knows many examples when companies undertook to refactor of large systems inside their products, the result of such changes was both new successes in their development and collapse. Discarding sad thoughts on this topic, we will see how the new system differs from the old one.
At the change of generations
The new control system is a quite noticeable event in the Unity world, the community greeted it with great enthusiasm, usually saying that the current version is not convenient. The manufacturer company shares this opinion and states that the old system been developed before adding a large number of supported devices and not designed for that at first. As a result, the Internet contains a reasonably large number of reviews, which usually show the configuration of the base window of the new Action Asset, you can immediately recognize it by three large, horizontally located, settings blocks. We will try to go in the opposite direction, at first we will look at the essential elements of the new system, and then move to the higher ones.
Documentation
For such a new package, New Input System has pretty good documentation, which always contains answers to questions, so I’ll immediately give a link to it, including due to the presence of restrictions that must be taken into account before migration. Also, please take a look at the answers section; this will significantly prepare you for the first steps.
Setup
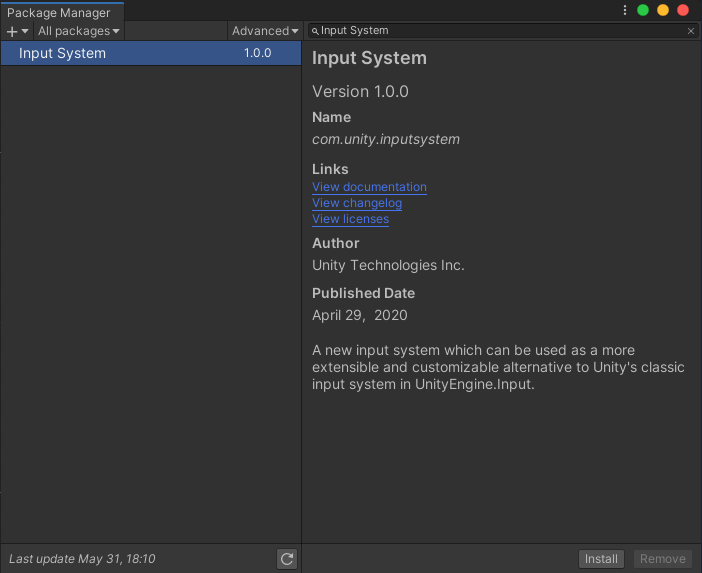
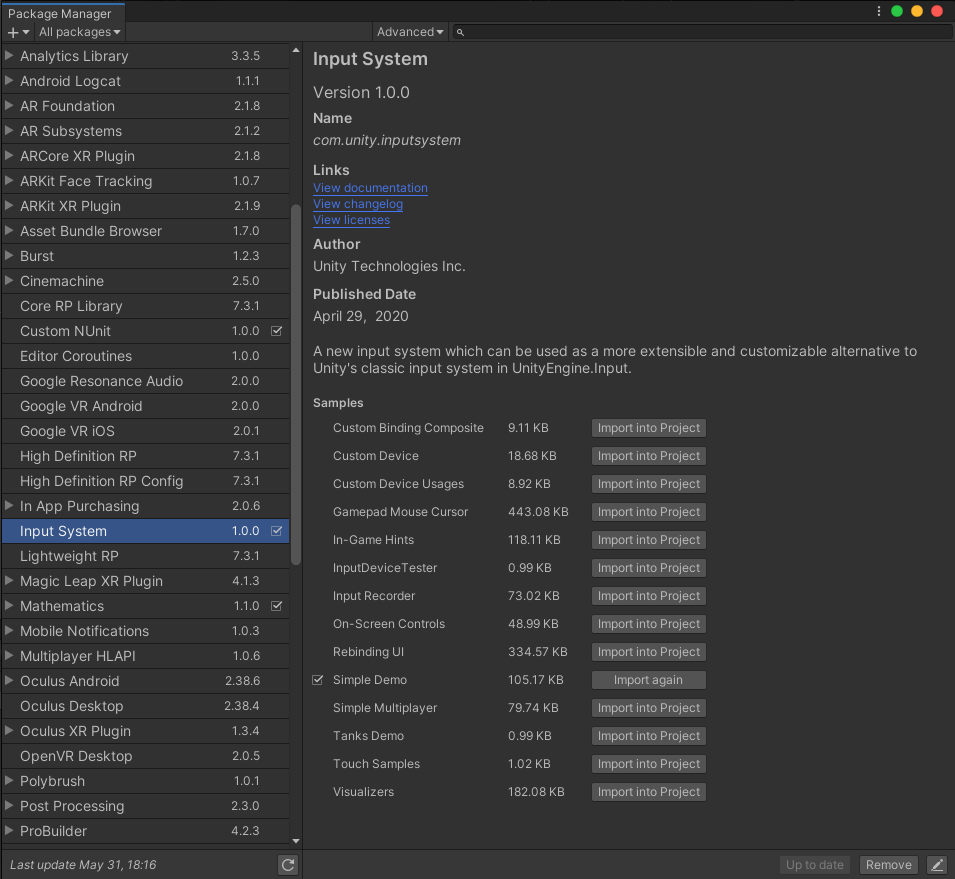
Since the package with the new control system has been released, it is easy to find it in the Package Manager by searching for the name Input System
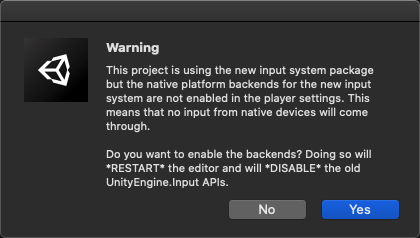
During installation, you will be notified that your native platforms backend turned off, and nothing will work until you switch to it with losing access to the current API
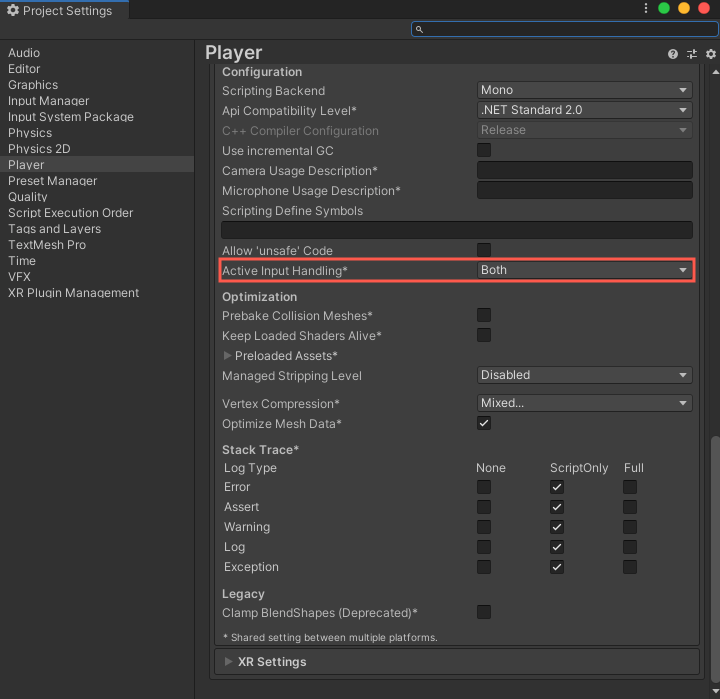
It’s not very clear why they try to scare fragile minds since it is possible to turn on both systems at once in the settings Edit > Project settings… > Player > Other Settings > Active Input Handling*. So it’s not very important how you answer the question about system switching, you can immediately change the backend to any value that suits you. =)
Samples
After installing the package, you will have access to a decent set of examples on the use of the new system, which contains everything you need from simple cases to more advanced topics like adding controls to the smartphone screen or reconfiguring control in runtime.
Architecture
The system is so wide that it’s quite problematic to consider all its settings, and it’s not necessary. The documentation covers all the points needed for a start.
If we describe the architecture in a nutshell, then it consists of three levels:
- Native backend - provided by the current platform and not part of the new input system
- Low-level layer - exchanges information with the backend in the form of events and raw data and heavily geared towards optimizing with memory operations and performance
- High-level layer - represents low-level data in a way convenient for configuration and use
Separately, it is worth noting that the new system is entirely built on events and actively encourages us to use them.
Input.GetMouseButtonDown(0)
I think that not many people set up control at the beginning of development or when testing the new mechanics, so the first thing I would like to know is how to catch a regular mouse click from the code. In the new system, the call to Input.GetMouseButtonDown(0) turned into Mouse.current.leftButton.wasPressedThisFrame. As you can notice, the number of characters has increased slightly. On the other hand, now you can forget about the index of the left button, and if auto-completion in your IDE understands what you want, the difference will be tiny. The same approach is used to access the keyboard, for example, releasing the space bar on the keyboard Keyboard.current.spaceKey.wasReleasedThisFrame.
InputAction
Using direct access to buttons is not the primary method of working with the new system. The basic concept in it is objects of type InputAction. It is an abstraction over the sources of events (buttons, sticks, etc.), which provides data about their state (whether the button pressed or direction of the stick) and notify of their changes with the help of events. It is best to treat them as logical elements (jump or shot) and not attach to physical properties such as button pressure.
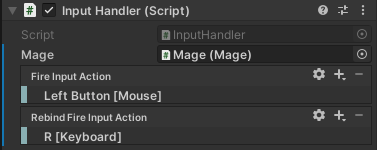
An example view of InputAction added to a component:

The InputAction setting provides a choice of the following parameters:
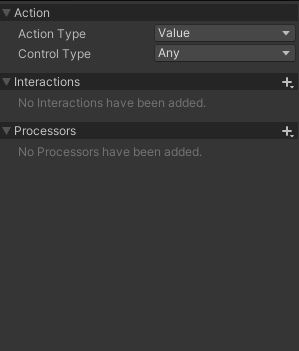
Action Type can be of three types:
- Value - standard type, used for any input, continually monitoring the status of devices
- Button - differs from Value in that it can only be associated with buttons and is used to track state changes
- Pass-Through - unlike other types do not use the started-performed-canceled scheme (the main types of events) and are always in the performed state, it is convenient to process all data from several event sources
Control Type - describes the data type provided by the device, for example, in the case of a stick, you can get data in the form of a Vector2 structure.
Interactions - provide the ability to customize specific actions, for example, long-press or multi-click.
Processors - add post-processing of data coming from the controller before distributing them to the logic, for example, normalizing the stick direction vector on the controller.
Access to physical devices varied depending on selected settings so that they can provide needed data. As an example, the mouse button is capable of processing only clicks, and, in the case of choosing to provide data in the form of a vector, cannot be used as a monitored input device.
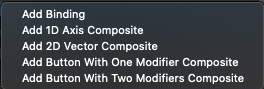
Also, there are several composite devices; for example, the direction of movement can be presented in the form of a vector obtained with four buttons (WSAD or another combination). If necessary, a set of composite devices can be supplemented with your own, more about this can be found in the documentation.
Using InputAction does not require any additional entities and is quite suitable for use in components. Do not forget that on creation, they are turned off and need a separate enable through a call of the Enable() method.
Action Maps
Action Maps is the union of several InputAction, which is responsible for different sets of actions in the game. Suppose, in the menu, you use the stick on the controller to move between different interface buttons, and in the game, the stick is responsible for the character moving.
Control Schema
Control Schema is an abstraction over InputAction, which allows you to set different triggers for these very actions, depending on the physical devices used. Suppose, control of movement from the keyboard happens through WSAD buttons, and from the controller through the left stick.
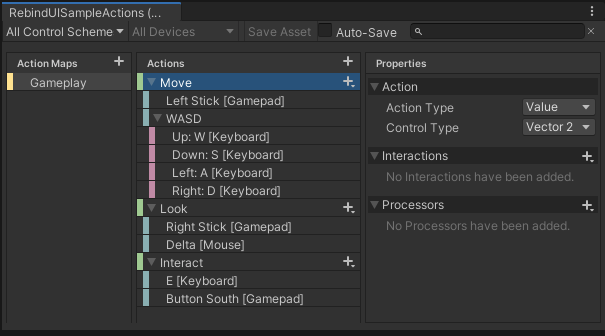
Action Asset
Action Asset is a new type of asset that is responsible for the comprehensive configuration of InputAction, ActionMap, and Control Schemes; it can be seen as a large panel of three blocks in most other reviews.
Wrap-up
The whole new system revolves around InputAction sets, and everything else designed to structure the work with them. As a result, there are four main approaches to using the new system:
- Accessing device data directly - as in the case with
Mouse.current.leftButton.wasPressedThisFrame - Using basic InputAction
- Generating a class with a set of InputAction from the Action Asset, which greatly simplifies the configuration of complex control systems using different schemes
- Using an Action Asset through a PlayerInput object
As you can see, the Action Asset is by no means a prerequisite for customizing the controls and serves only to simplify working with extensive and complex solutions.
Control rebinding
In the last article, we looked at the command pattern, which usually used to add the ability to reconfigure controls in the game. Using this approach in the new system will add an extra layer of abstraction over InputAction since they are already logical elements. In turn, the control change is not very obvious and implemented through a class with the suspicious name InputActionRebindingExtensions. There is a separate item in the documentation on this topic and a rather complicated example called Rebinding UI that comes with the package. Since this is an essential element for the control system, we will consider its minimalistic implementation below.
Practice
Examples with full-fledged creation of the Action Asset are quite common on the Internet, and there is no sense to repeat them one more time. So, as a minimalistic example, we change the magician’s control from our previous articles to use the new system with usage of basic InputAction and also add the ability to reconfigure the control.
Implementation
|
|
There is no additional configuration required for the essential usage of InputActions other than adding of buttons
Result
The left mouse button used for the first launch of the spell, and the second shot occurs after reconfiguring the action to use the f keyboard button
Conclusion
Initially, working with the new system causes associations with the addition of a custom editor to some component, as, for example, in our article about the color editor for the Perlin Noise generator. But understanding that this is a massive change in the current approach and the transition to an entirely new API comes very quickly. An extensive set of features and new components can scare off, but the documentation and examples are pretty good for the first version. All of this brings hope for a quick dive into it unless the current restrictions are not a big deal for your project. I hope this article has clarified the basics of working with the New Input System for you. See you next time! =)