Platinum sponsors


State pattern
What does the Witcher have to do here?
Today’s post will continue the topic raised in an article called "Unity and Singleton" and talk about the pattern that can be found in any game, including the tabletop - State. This template takes one of the most prominent roles in the gaming industry. It is prevalent with such aspects of the game as artificial intelligence - the state determines performed action, animation - state decide which animation sequence to show, user interfaces - transitions between windows, or even dialogue systems (hello picture with the Witcher!). If you look closely, games almost entirely are controllable sequences, and therefore can be described in terms of this pattern.
Theory and practice
Patterns are a very popular topic in programming, so for general information, you can refer to this wonderful book or this article.
From a practical point of view, unlike singleton, which has a fairly typical implementation in almost all languages, states can have a rather distinct look. Depending on the purpose, it can be huge(to describe events), or it can take the form of a simple switch(to add a field in the UI). Therefore, bringing an implementation that could be copied does not make sense. For typical examples, you can refer to the above theory articles or search on the Internet.
Well, once theory and practice are over, let’s move on to the entertainment part.
Unity
In modern game engines, most of the effort devoted to creating tools that are accessible to all who are not very familiar with programming. In Unity, one such thing is a mechanism called "Mecanim.“ Its main goal is to create animations, as you might imagine, based on state machines. Let’s see if we can apply this mechanism to implement tasks in a general way.
For example, let’s make a simple scene with text which switches between the "Active" and "Paused" states on a mouse button click.
-
Create a scene and place on it a UI element with text
-
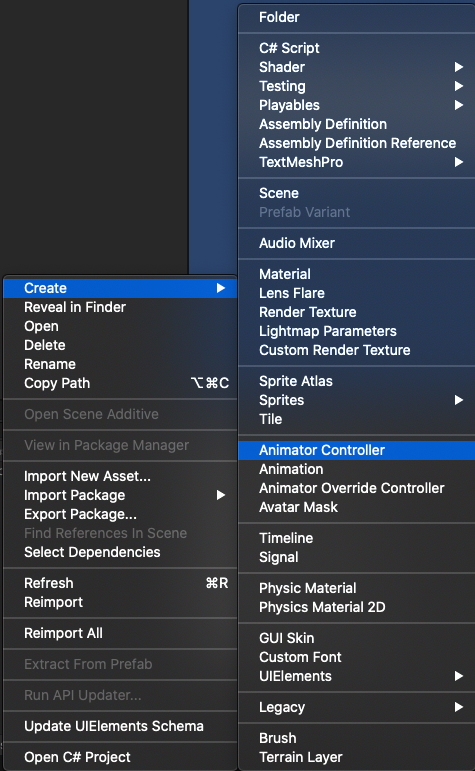
Create assets
AnimatorController- This is a template object for our state machine
-
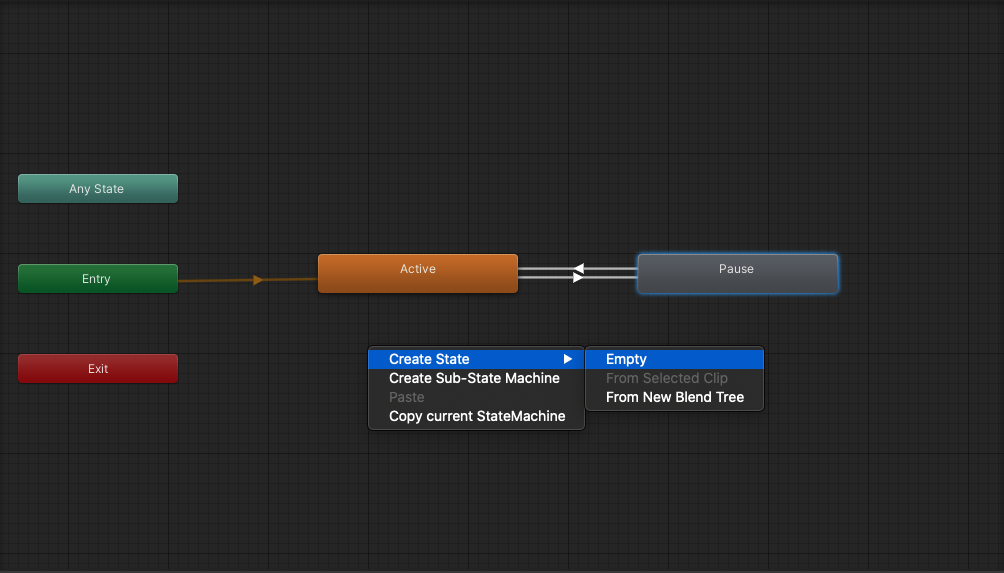
On the
"Animator"tab (you can double-click on our new asset or throughWindow > Animation > Animator) create two states"Active"and"Paused"
-
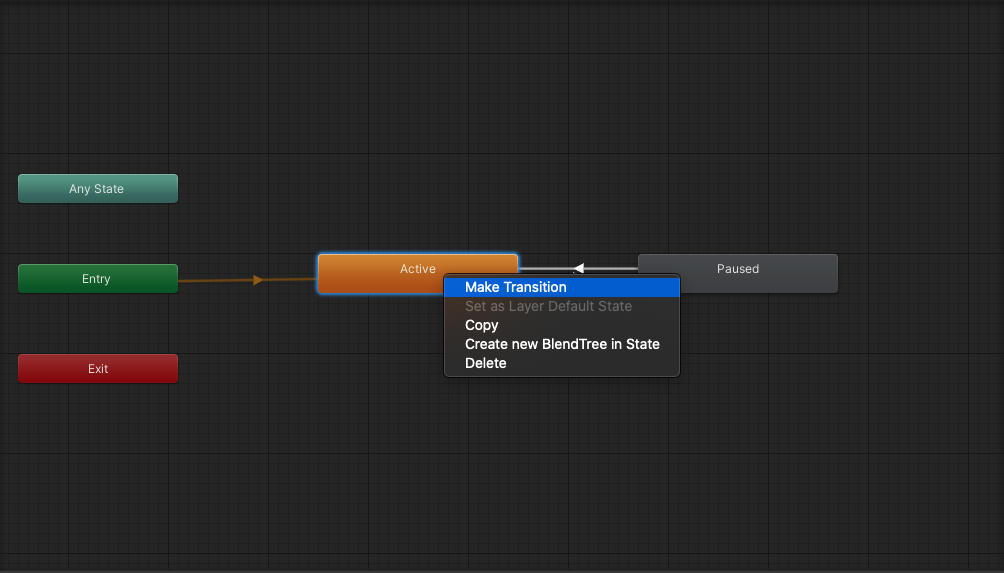
By clicking on the state, you can add a transition. Connect the states in both directions
-
Switch to the
"Parameters"panel and create a"Switch State"trigger
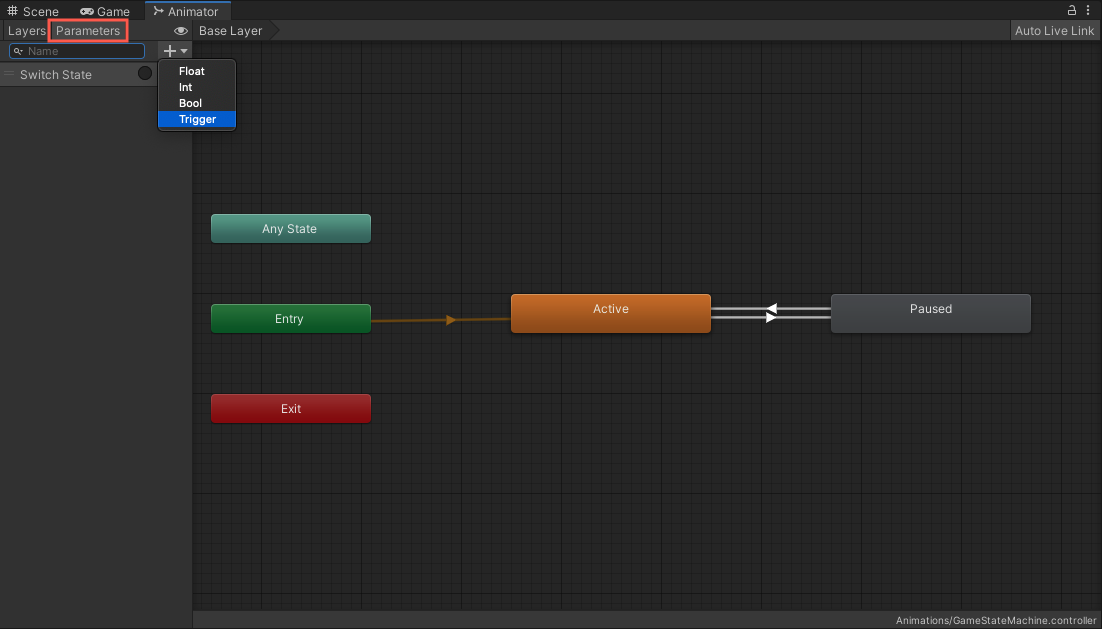
-
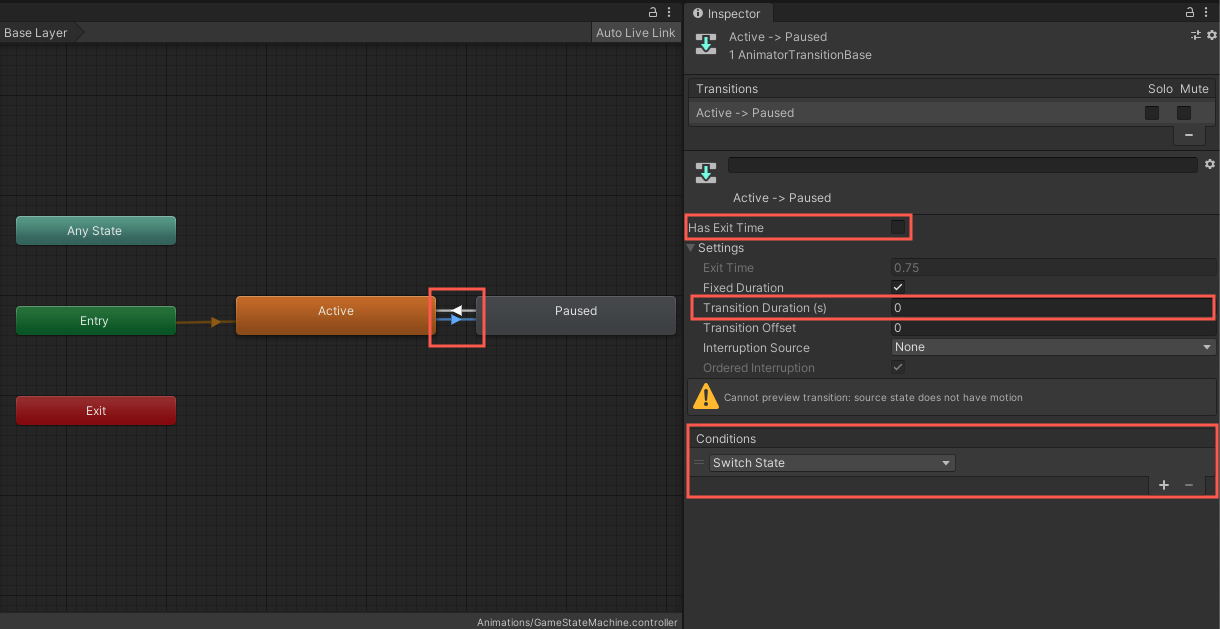
Highlight the transition between
"Active"and"Paused"in the inspector turn off the"Has Exit Time"parameter; set the"Transition Duration"to zero; add"Conditions” - “Switch State.“Do the same with the transition from"Paused"to"Active"
-
Create a script named
"Game"
 1
 2
 3
 4
 5
 6
 7
 8
 9
10
11
12
13
14
15
16
17
18
19
20
21
22
23
24
25
26
27
28
29
30
31
public class Game : MonoBehaviour { [SerializeField] private Text text = null; private Animator _animator = null; // Start is called before the first frame update void Start() { _animator = GetComponent<Animator>(); } // Update is called once per frame void Update() { if (_animator.GetCurrentAnimatorStateInfo(0).IsName("Active")) { text.text = "Active"; } if (Input.GetMouseButtonDown(0)) { _animator.SetTrigger("Switch State"); } } public void SwitchToPause() { text.text = "Paused"; } } -
Create “
"PauseState"script
1
2
3
4
5
6
7
8
9
public class PauseState : StateMachineBehaviour { public override void OnStateEnter(Animator animator, AnimatorStateInfo stateInfo, int layerIndex) { base.OnStateEnter(animator, stateInfo, layerIndex); animator.gameObject.GetComponent<Game>().SwitchToPause(); } } -
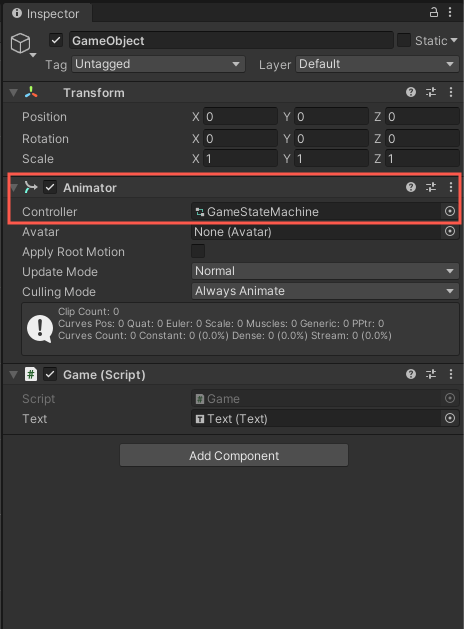
Create an empty object on the stage and add the
"Game"script to it, set the text that will display the current state, add the"Animator"component and set theAnimatorControllercreated in step 1 to the"Controller"field
-
Open the tab
"Animator,“select the status"Paused"and add the script"PauseState"
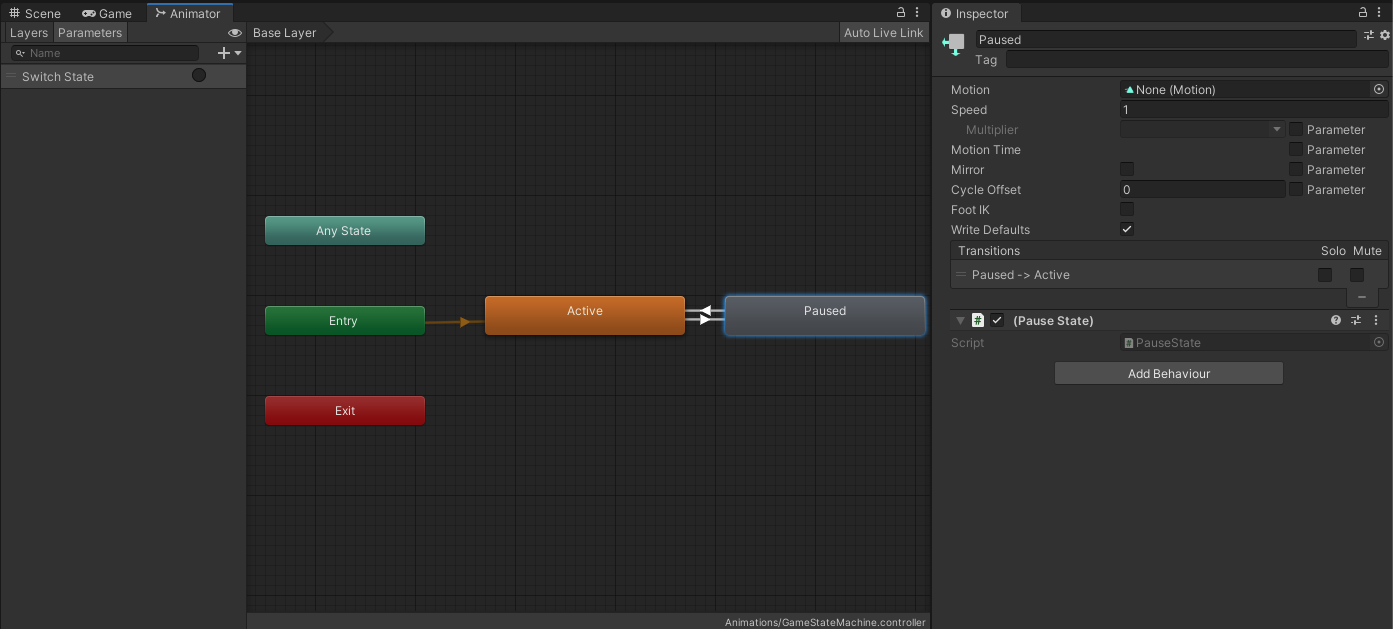
As a result of all these actions, we get a scene in which the mouse left click switches the state, "Active" is checked directly from the object code, and the "Paused" state executes the code from the state machine.
Conclusion
This method is similar to the proposal to scratch the right ear with the left foot, but, on the other hand, it is a real and proven mechanism for creating state machines, even if initially it was intended to work with animations. It is not very clear why developers will not separate the functionality of the state machine from animations, turning it into a universal tool. One thing is for sure - this is one of the main tools when developing a game on Unity, so we killed two birds with one stone trained with Mecanim and remembered what the Status pattern is. Although, when you catch one more bug on your implementation, this method may not seem like such a bad alternative. See you next time! =)