Platinum sponsors
Scene transitions in Unity

Is this an anime blog?
I think that everyone who watched at least one anime series noticed a small part in the middle, which usually serves to jump between the scenes and the ad unit - bumper (Japanese - アイキャッチ aikyatchi). The picture from the title of this post is such a transition in “New Game!" title about a small game studio. Oh yes, since this is a blog about Unity, then we will consider the design of the transition between the scenes in it. =)
The scenes in Unity are the basic unit of dividing the game into parts, and the transition between them is not complicated by itself. The transition is implemented through the SceneManager class, using the LoadScene() or LoadSceneAsync() methods. But without additional decoration, these transitions will be sharp, and this will look strange. Let’s try to smooth this transition, adding a little visual appeal to the project.
The scheme is quite simple: both scenes between which the transition is made should be visually identical at the time of unloading the previous one and loading the next. Usually, such a transition organized through the animation of some scene elements. For example, in this post, we use a black screen (the component responsible for this effect will be a black picture). The previous scene should gradually go black, and the next one smoothly appears from it.
The word animation hints at the use of the mechanism in Unity called "Mecanim.“ If you are not very familiar with it, then you can read (or even better use it as an exercise) the previous post "State Template,“ in which, for training purposes, this mechanism used to create a state machine without animation.
Objective
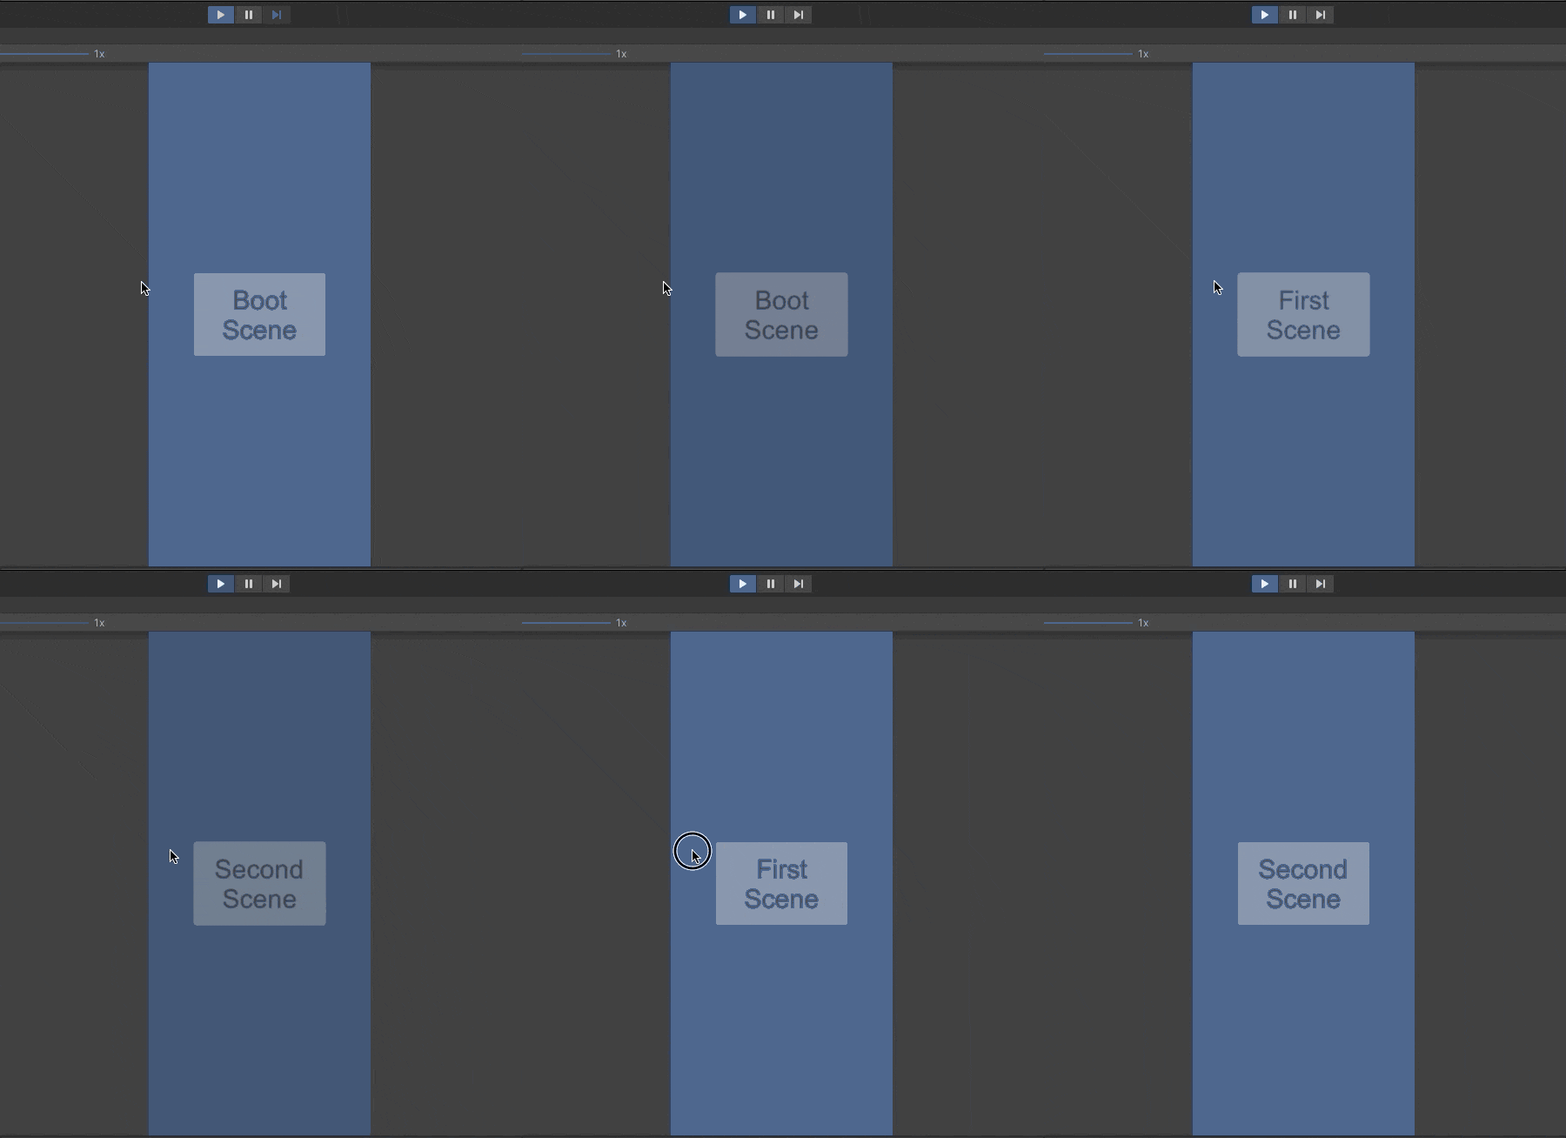
Make the transition between the three scenes through a blackout. The first scene appears instantly and, after 2 seconds, goes into the second. The transitions between the second and third are looped and performed smoothly by click.
Preparation
- Create three scenes:
- BootScene - the very first scene the game lands on, we’ll show it right away without dimming
- FirstScene and SecondScene - two scenes with transitions to each other by mouse click
- Add scenes to
Build Settings
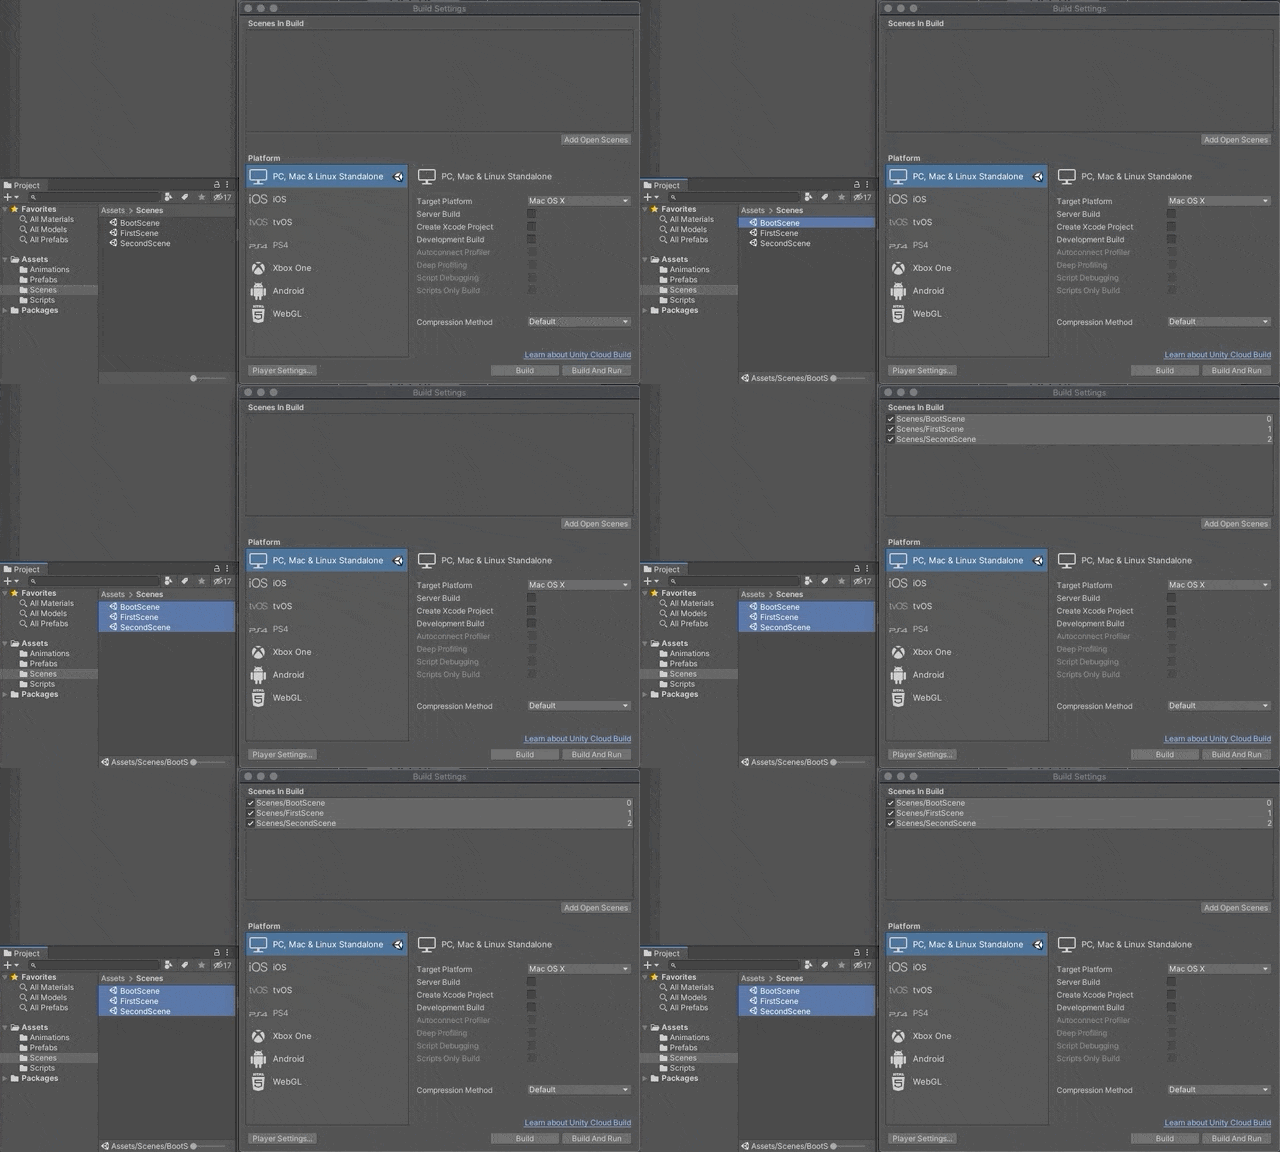
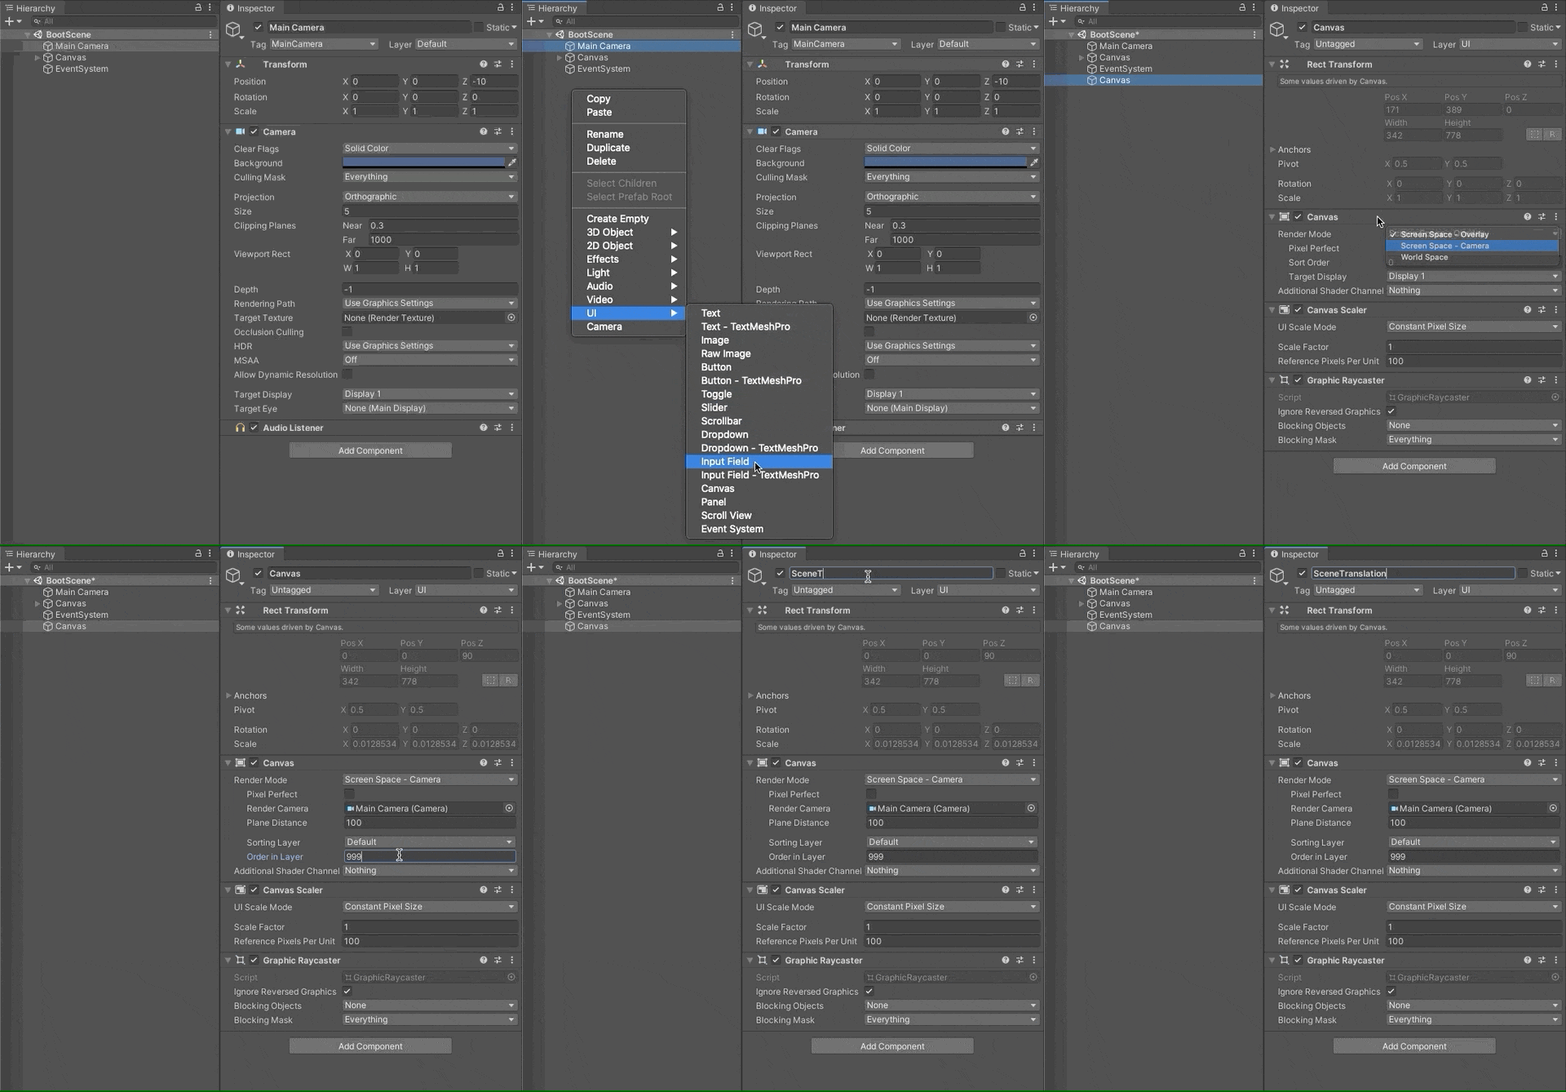
- Create one more
Canvaswith the nameSceneTransition. SetRender Mode - Screen Space - Cameraand add theMain Camera. SetOrder in Layerto999, so its always on top of other elements
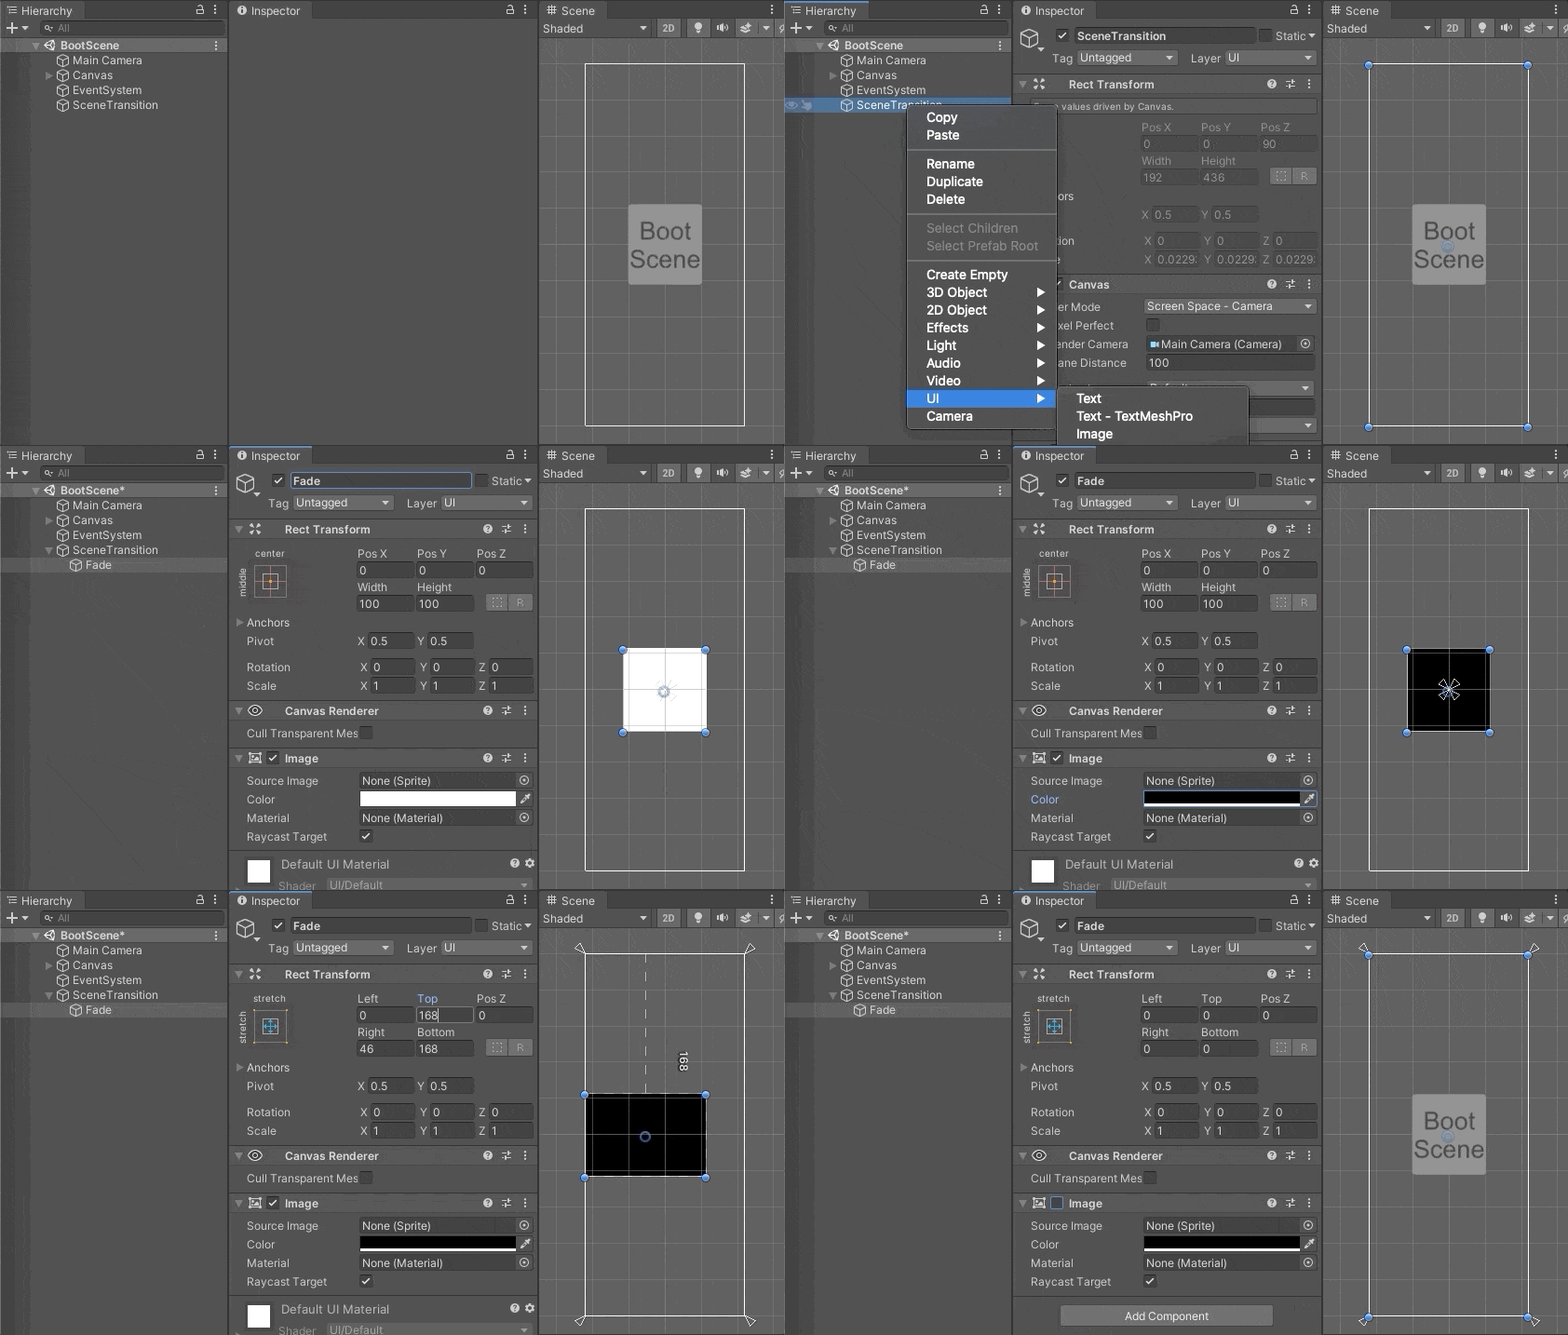
- Add a new
ImagetoSceneTransitionand name itFade. Completely black, covering the entire screen area. You can turn it off so that it does not block the screen
Animation
- Create folder
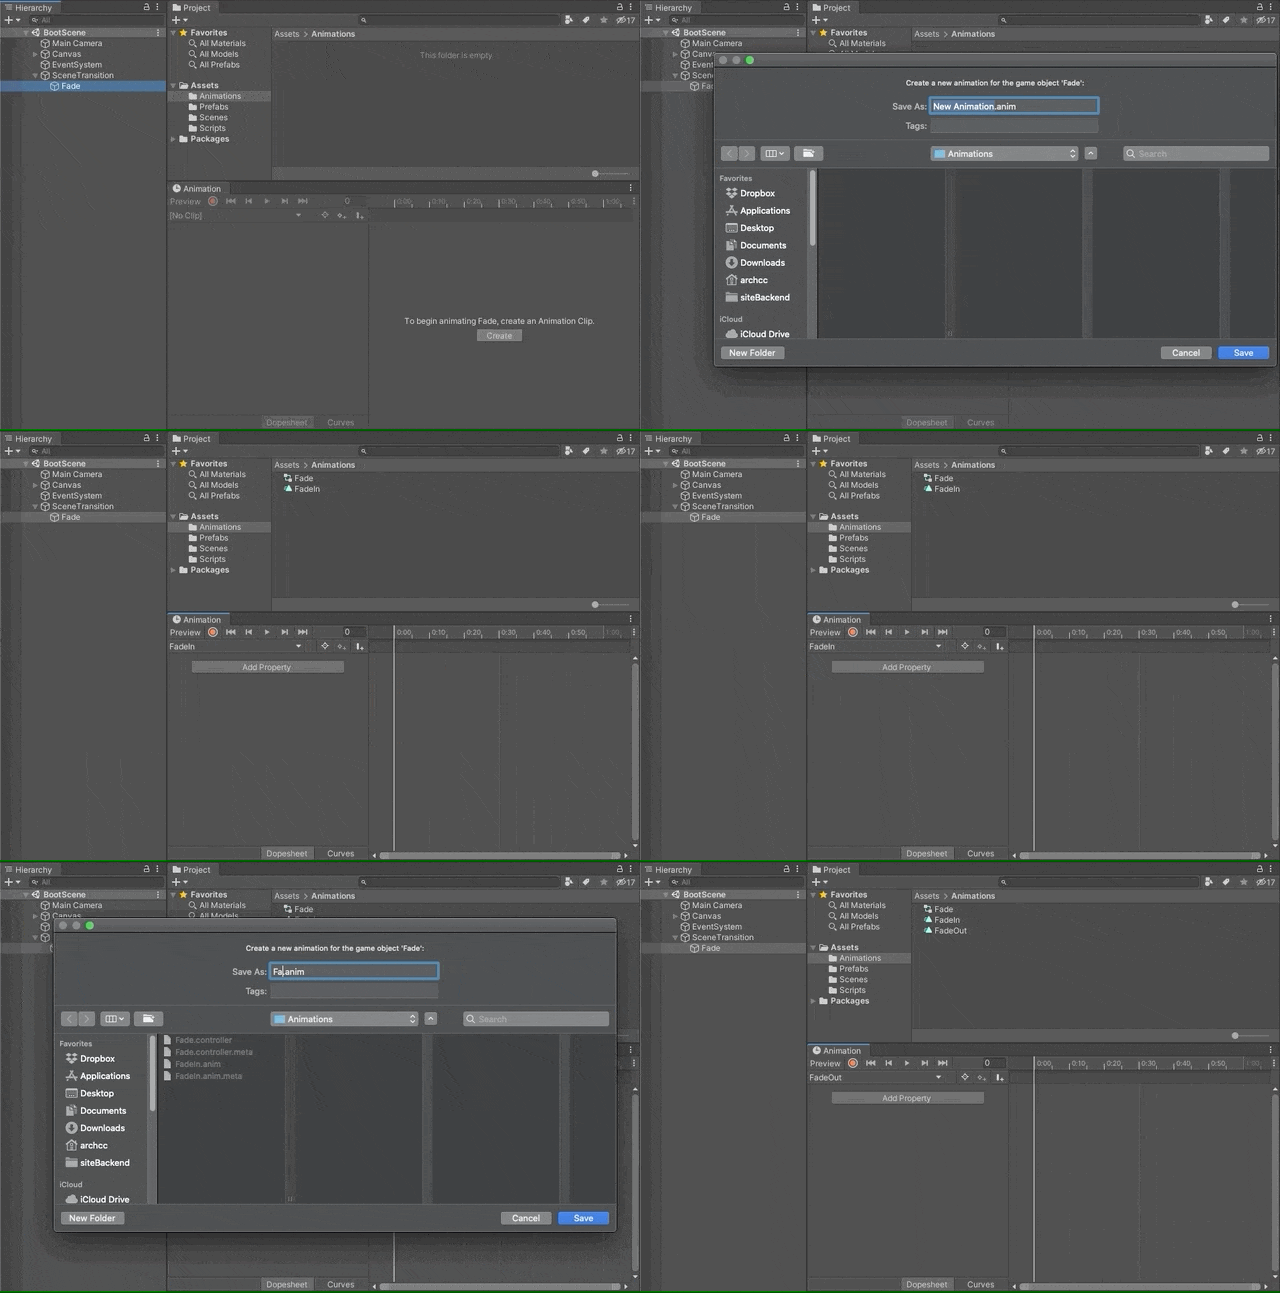
Animations - Open an
Animationtab. After selectingFade, clickCreatebutton and createFadeInanimation, also createFadeOutanimation.
- Set up
FadeInanimation. Select theFadeInasset. Remove theLoop Timecheck. Select aFadeobject. On theAnimationtab, push theEnable/Disable keyframe recording modebutton and enable action recording. EnableImagecomponent. Move time mark on theAnimationtab to 1 second. In color-chooser setalpha = 0. DisableImagecomponent. On theAnimationtab, disable action recording. Checking the animation of the smooth appearance of the UI from dimming.
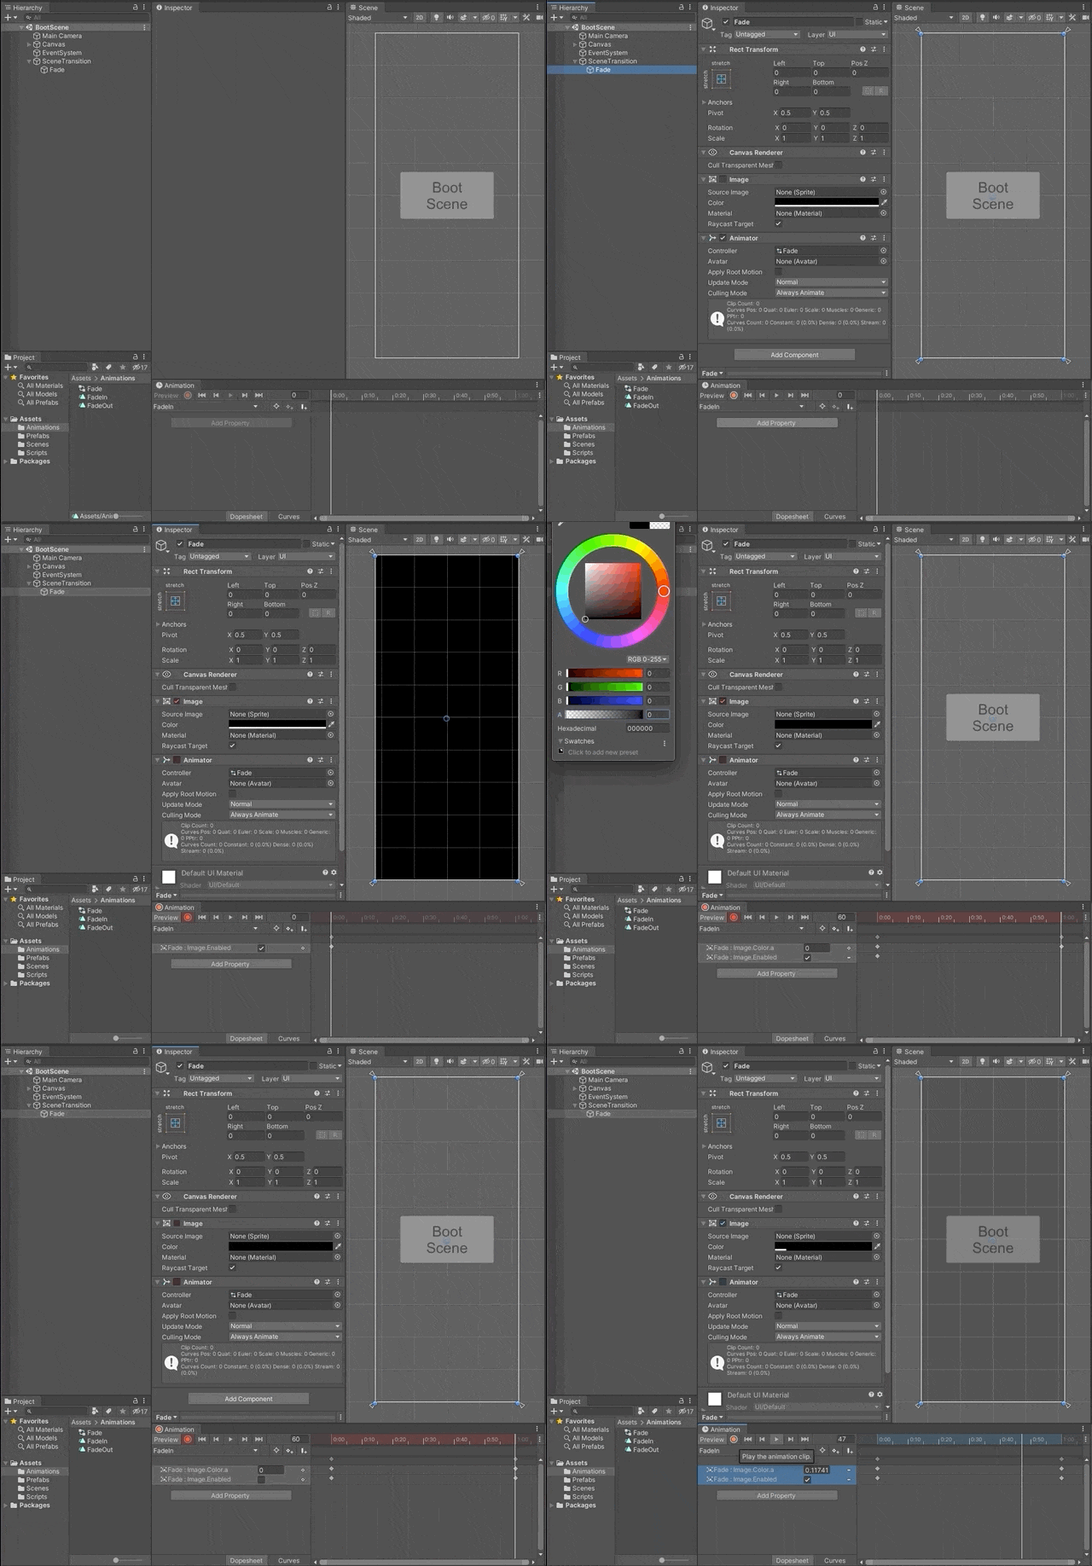
- Set up
FadeOutanimation but in reverse order: enableImage, an alpha channelfrom 0 to 100. Practice on this step by yourself - Set up an animation transition. On the
Animatortab, add aFadeOuttrigger. Add a transition betweenFadeIn and FadeOut. On new transition, disableHas Exit Timeand setTransition durationto 0. InConditions, add created triggerFadeOut.
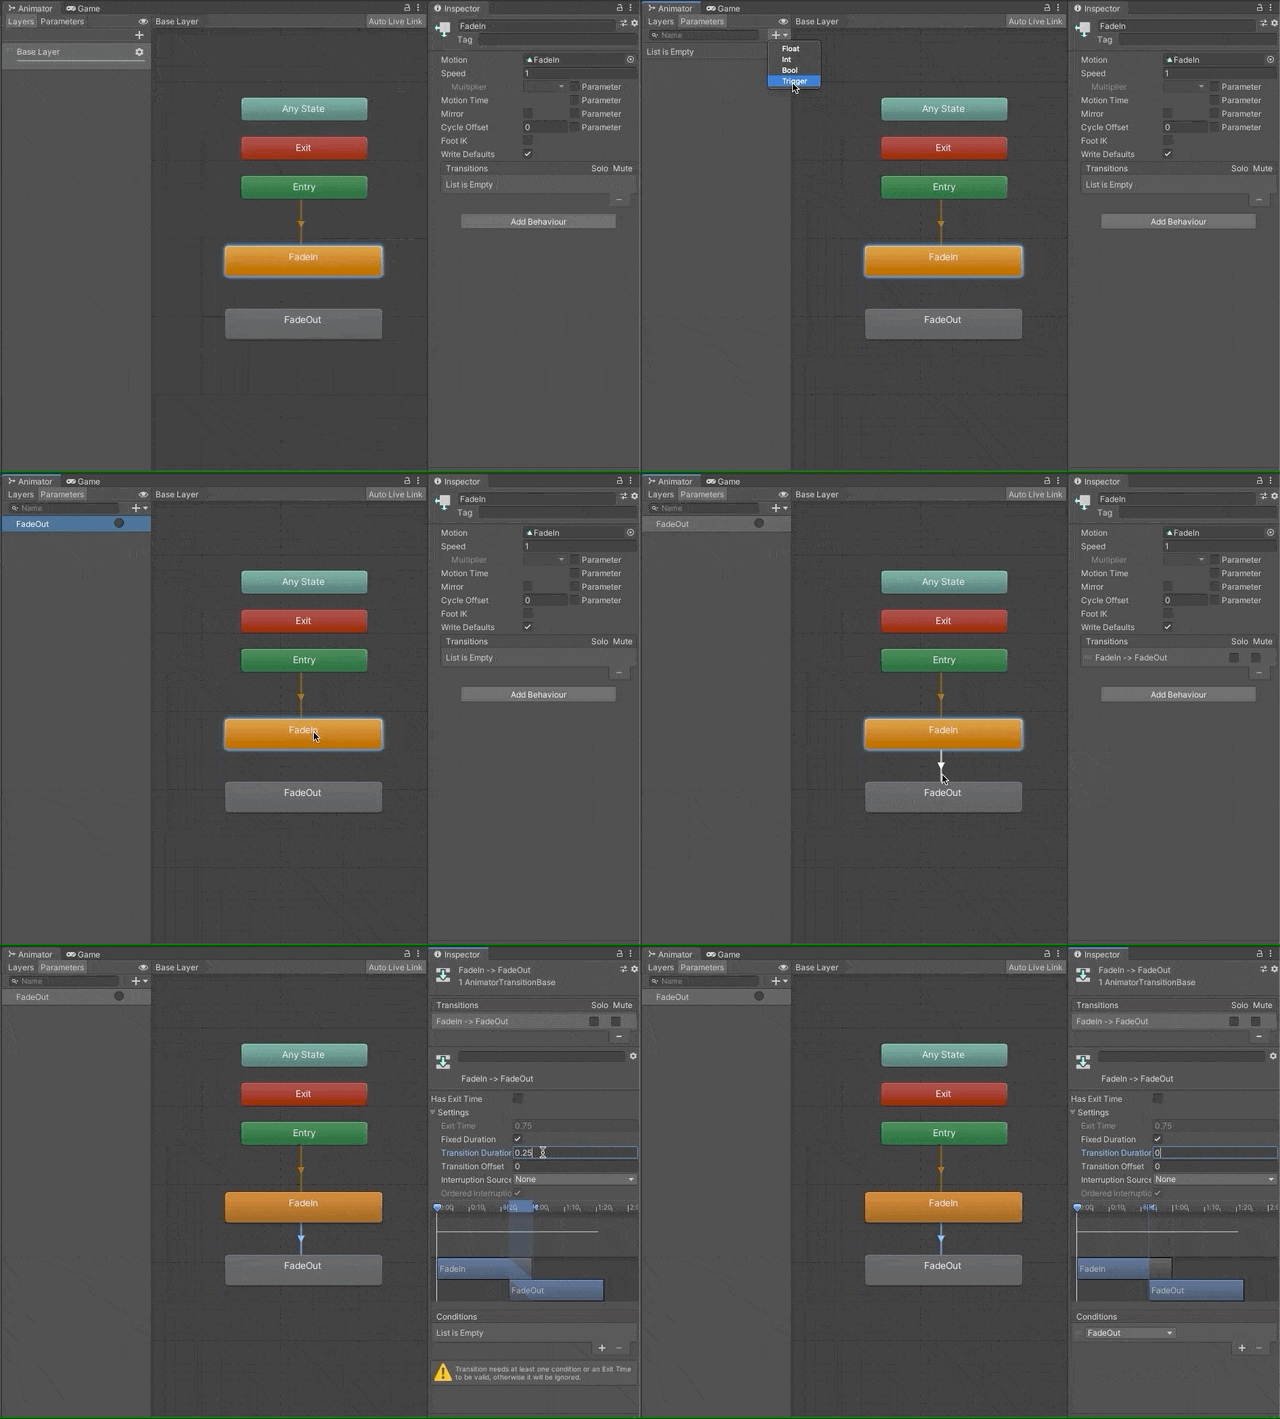
- Create script
TransitionHandlerwitch will be used on the end ofFadeOutanimation
|
|
- Add
TransitionHandlerscript toFadeobject. At the end ofFadeOutanimation, addEvent. ChooseFadeOutFinished()function from theTransitionHandlerscript
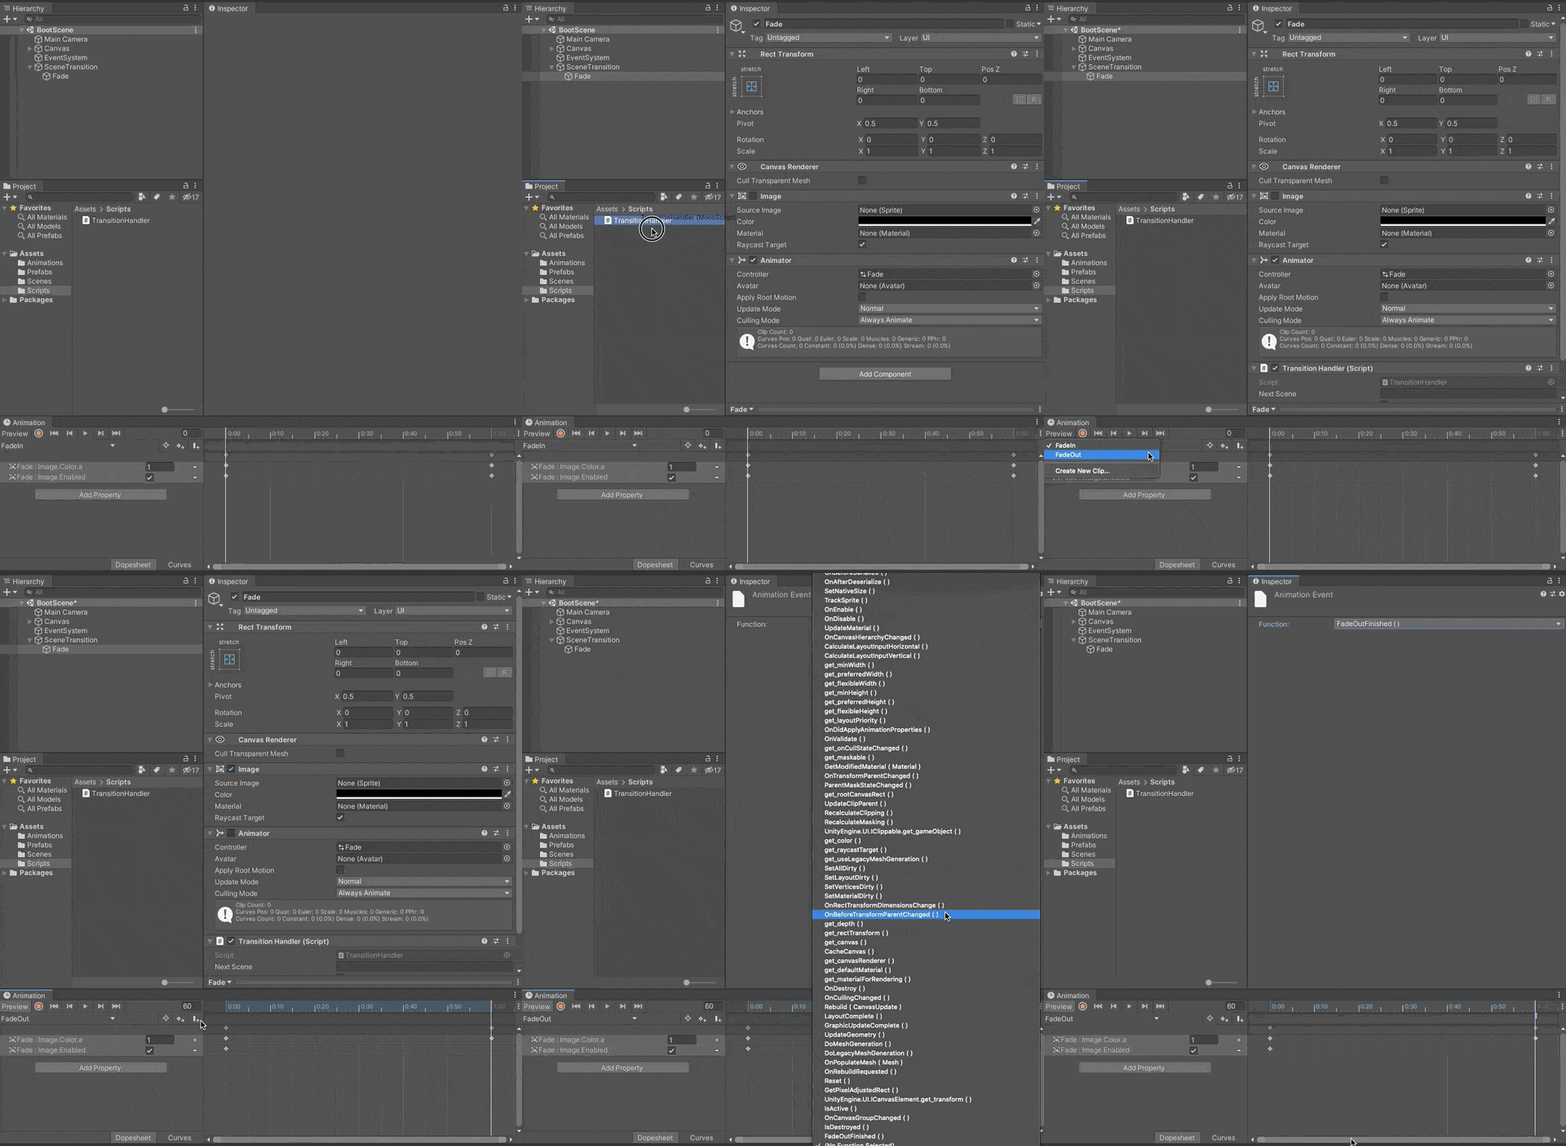
Event object on theAnimationtab looks like that

- Create a
PrefabfromSceneTransitionobject
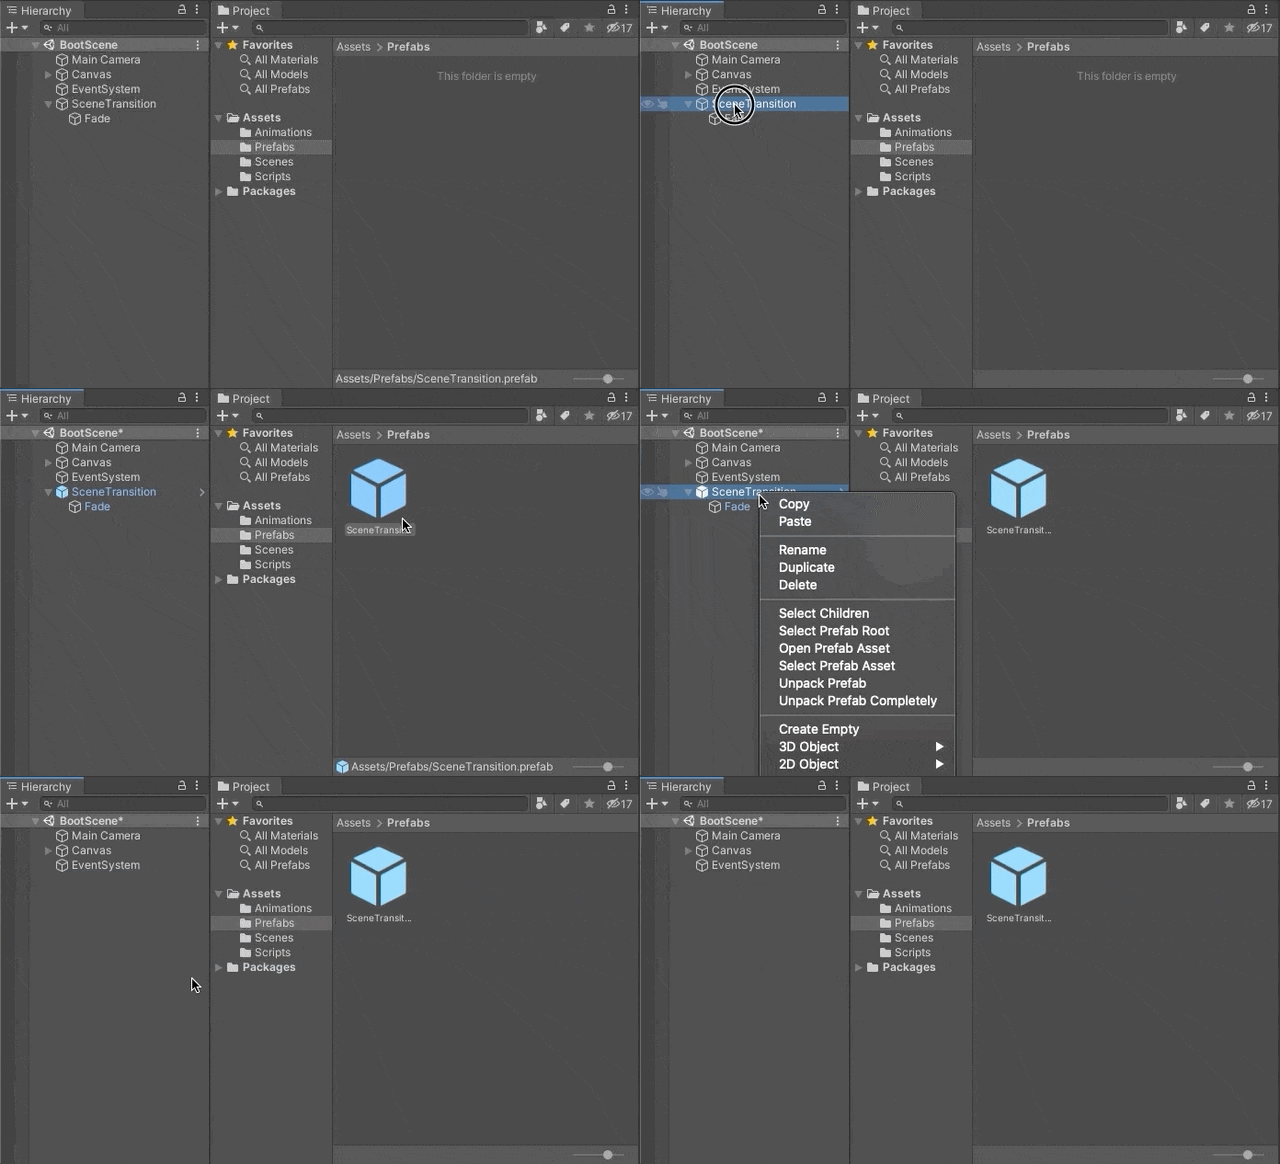
Transition set up
- Create script for
BootScenewich will start transition toFirstSceneafter 2 seconds
|
|
- Set up
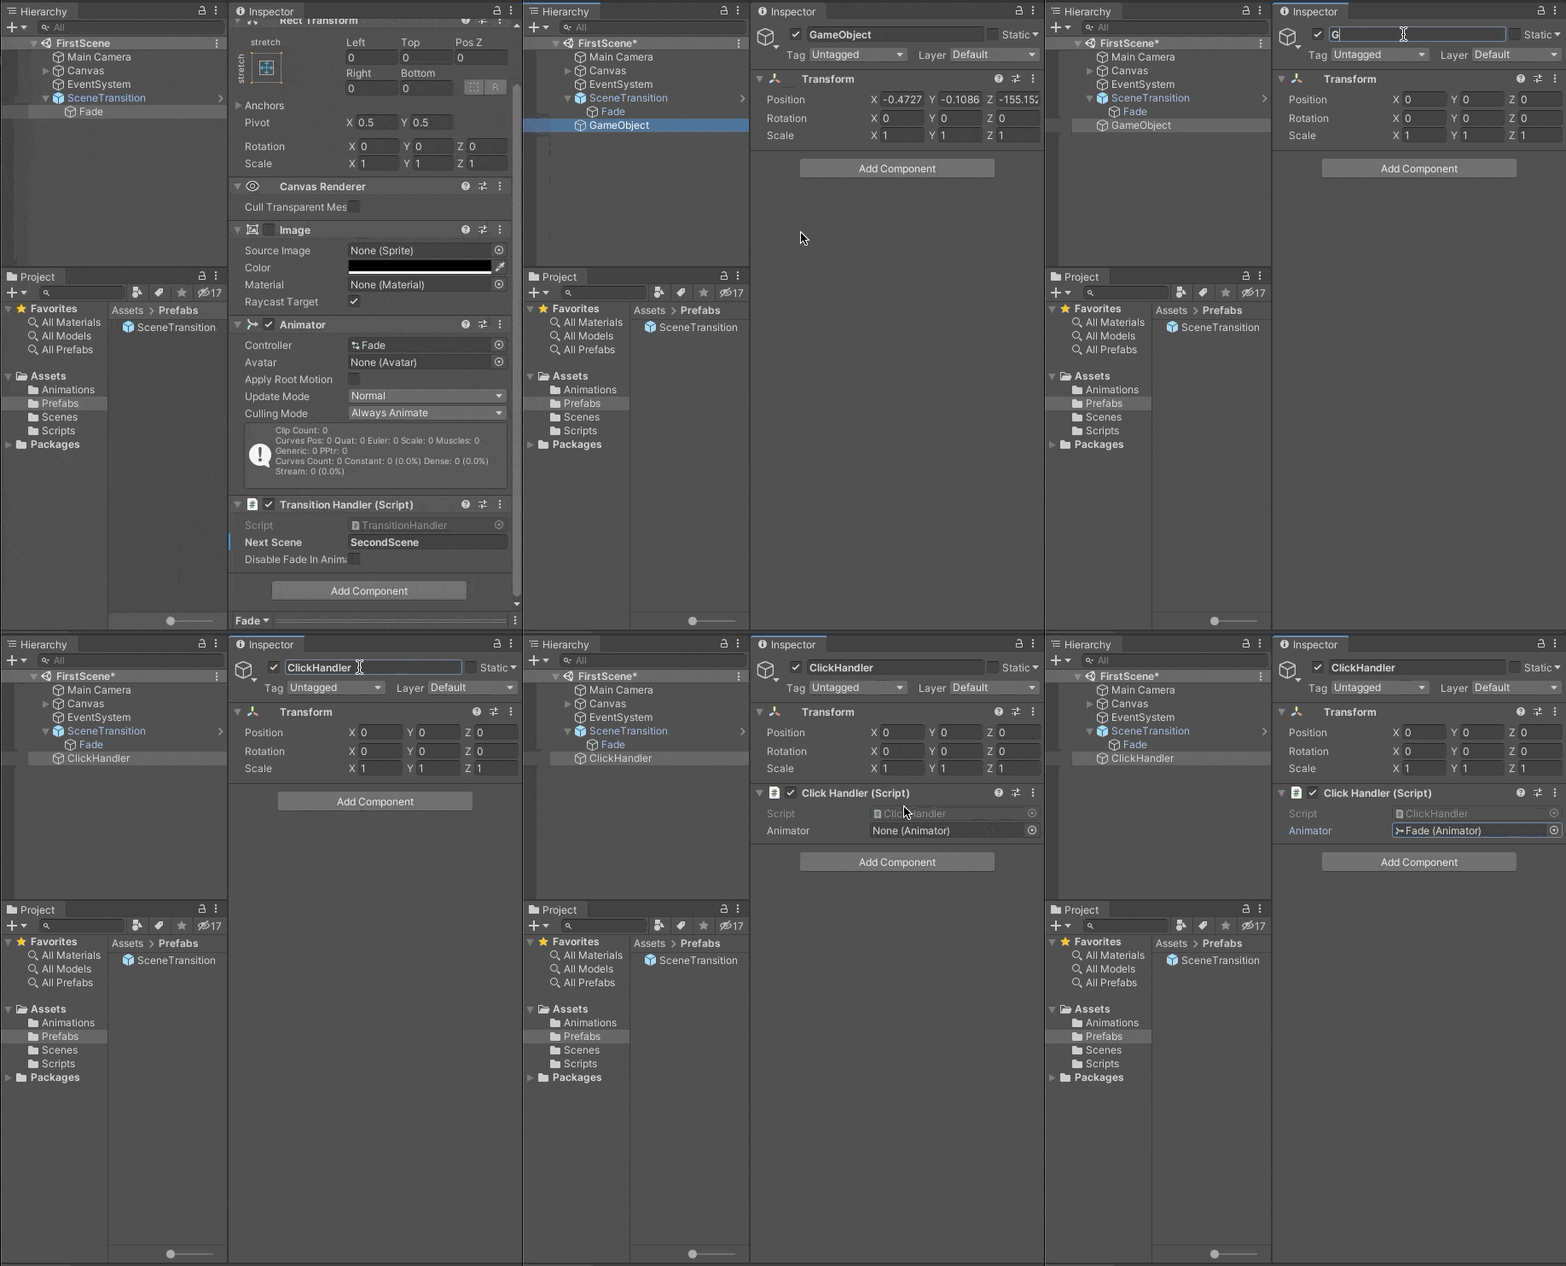
BootScene. AddSceneTransitionprefab. Set Main Camera to canvas component. Write the next scene name,"FirstScene."Disable fade-in animation
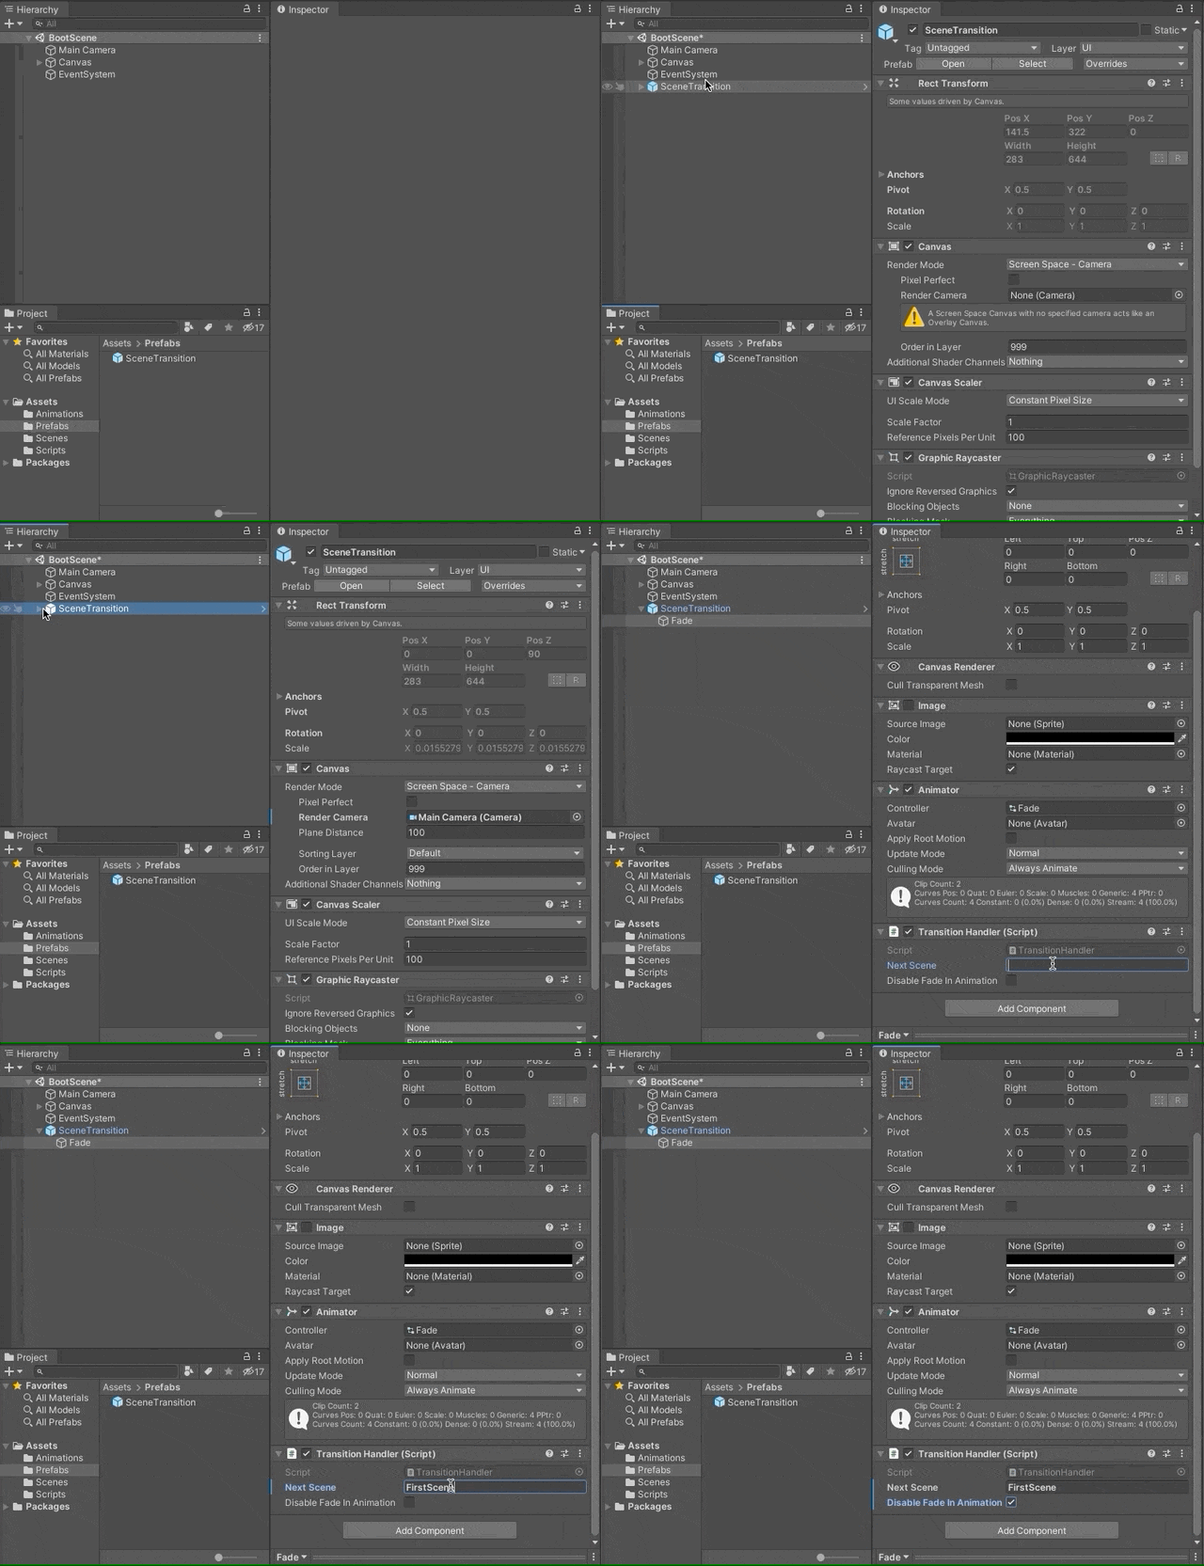
- Add an empty object to the scene and name it
BootHandler. After that, add a script from step 1. Set upanimator
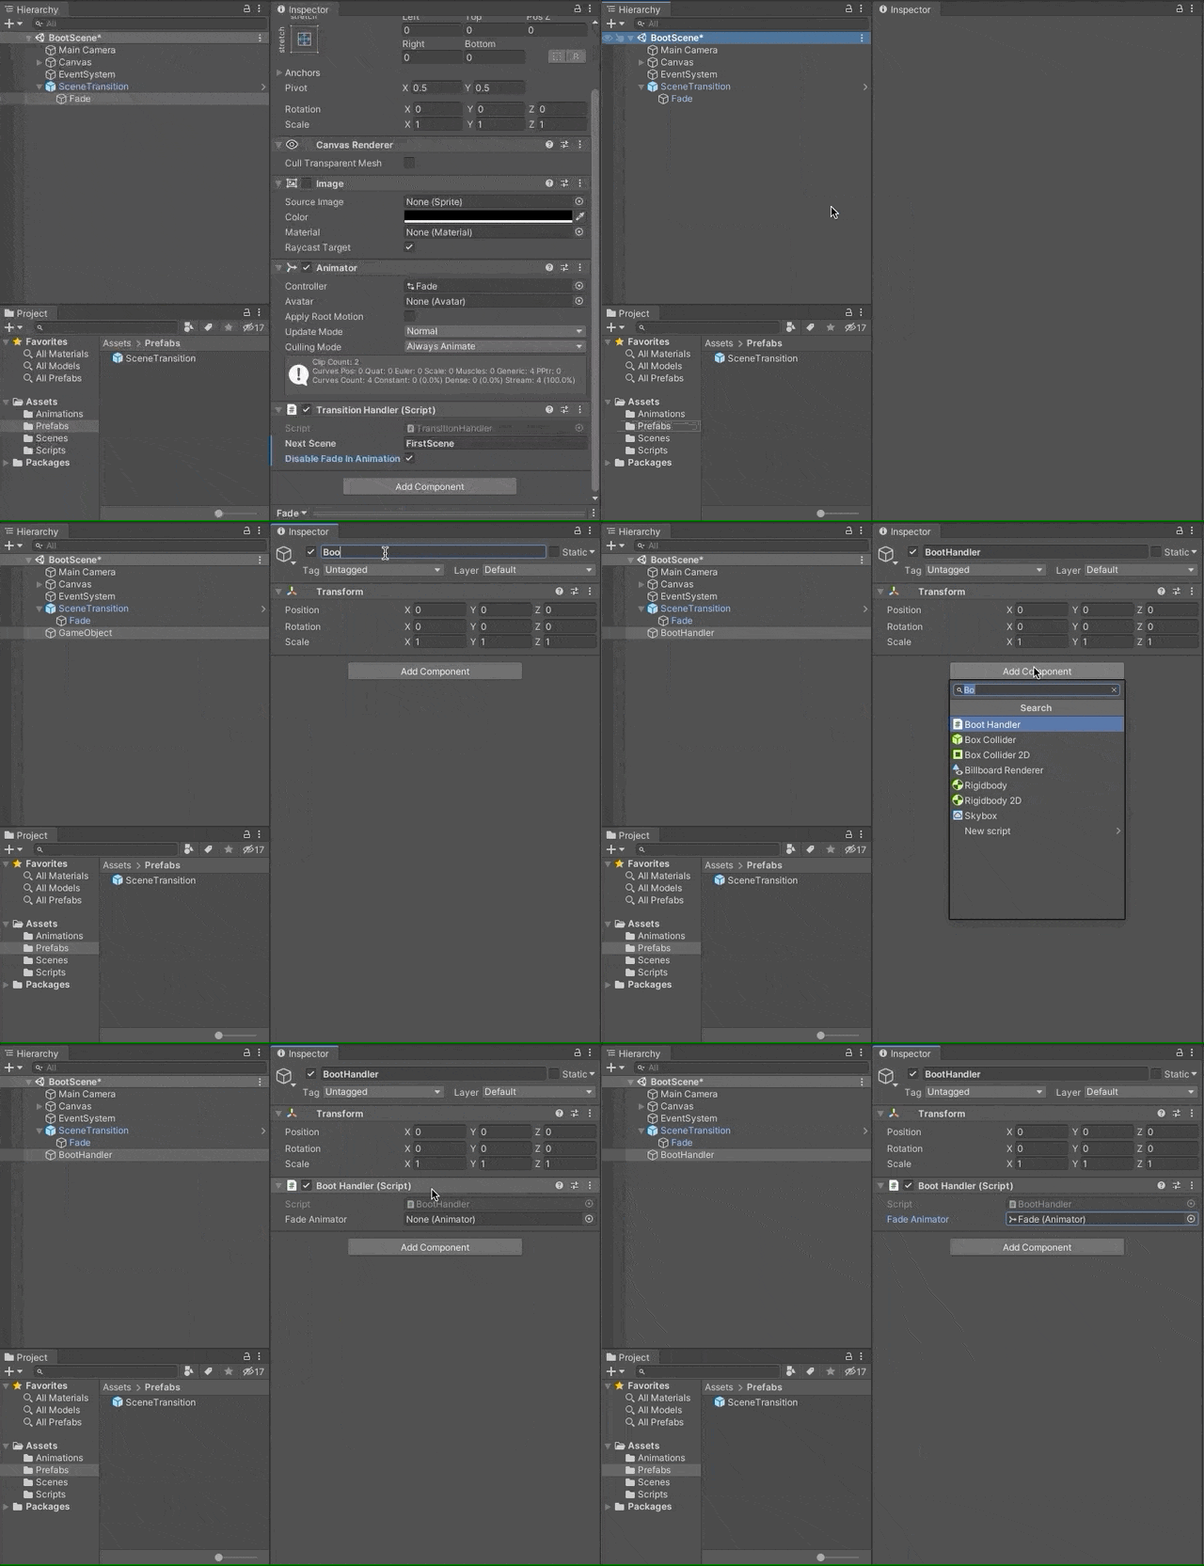
- On test start of
BootScenemust have fade animation before the transition
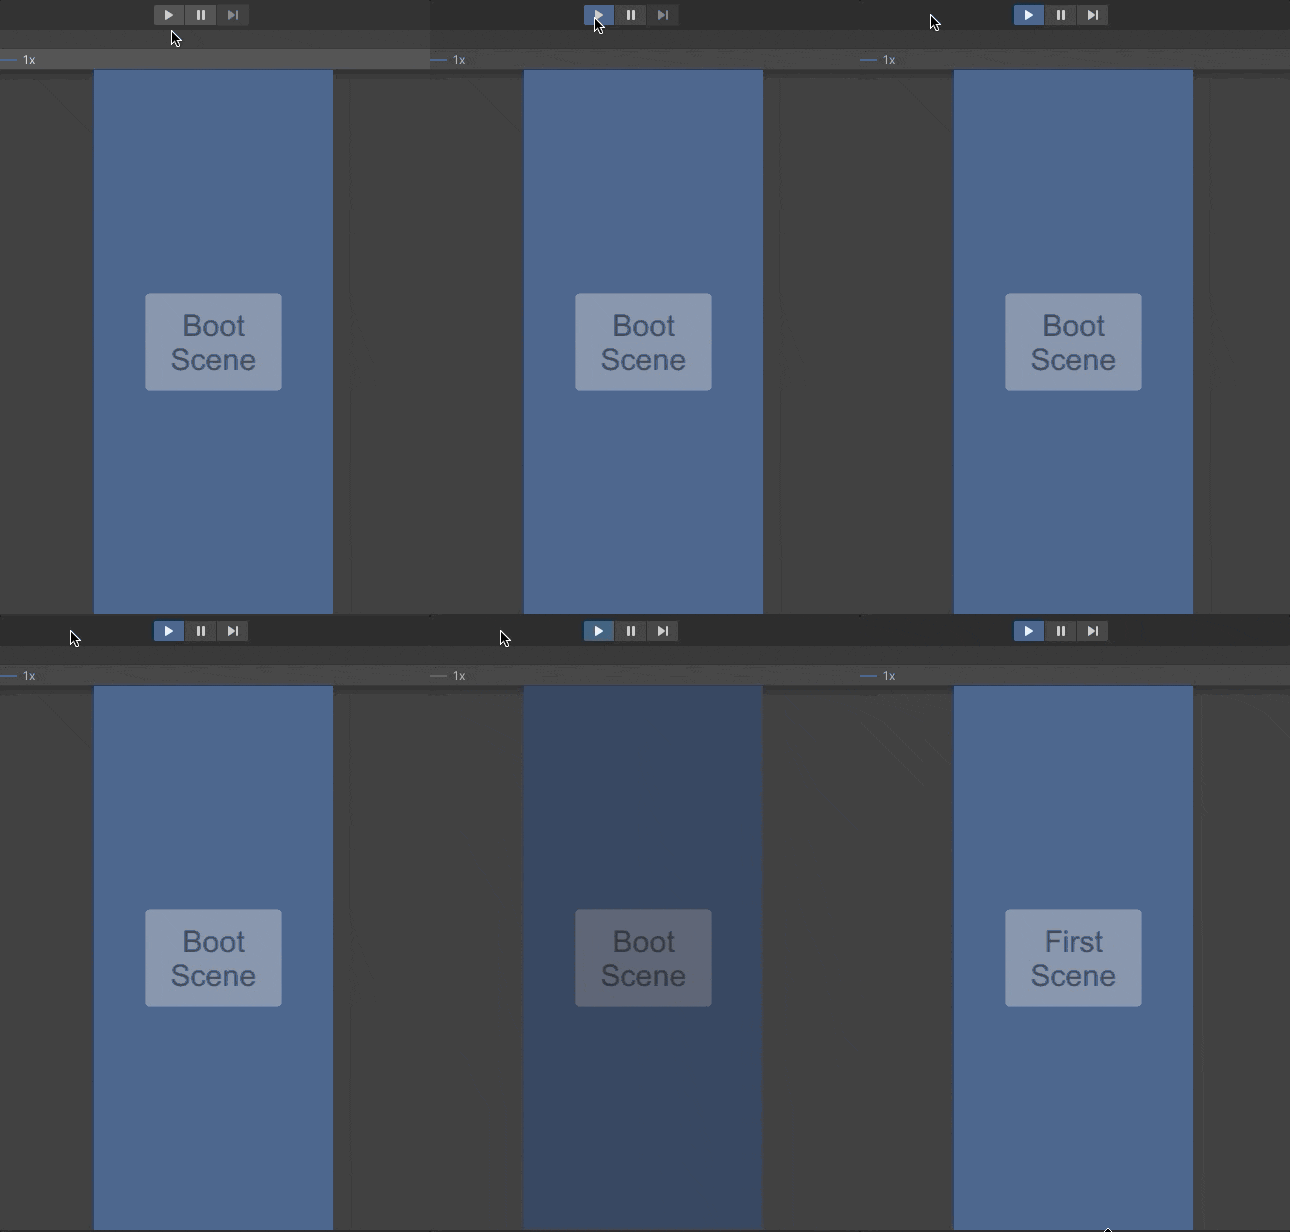
- Create
ClickHandlerscript for other scenes, which handle transition by mouse click
|
|
- Set up
"FirstScene". AddSceneTransitionprefab. Set "Main camera." Set next scene name -SecondScene
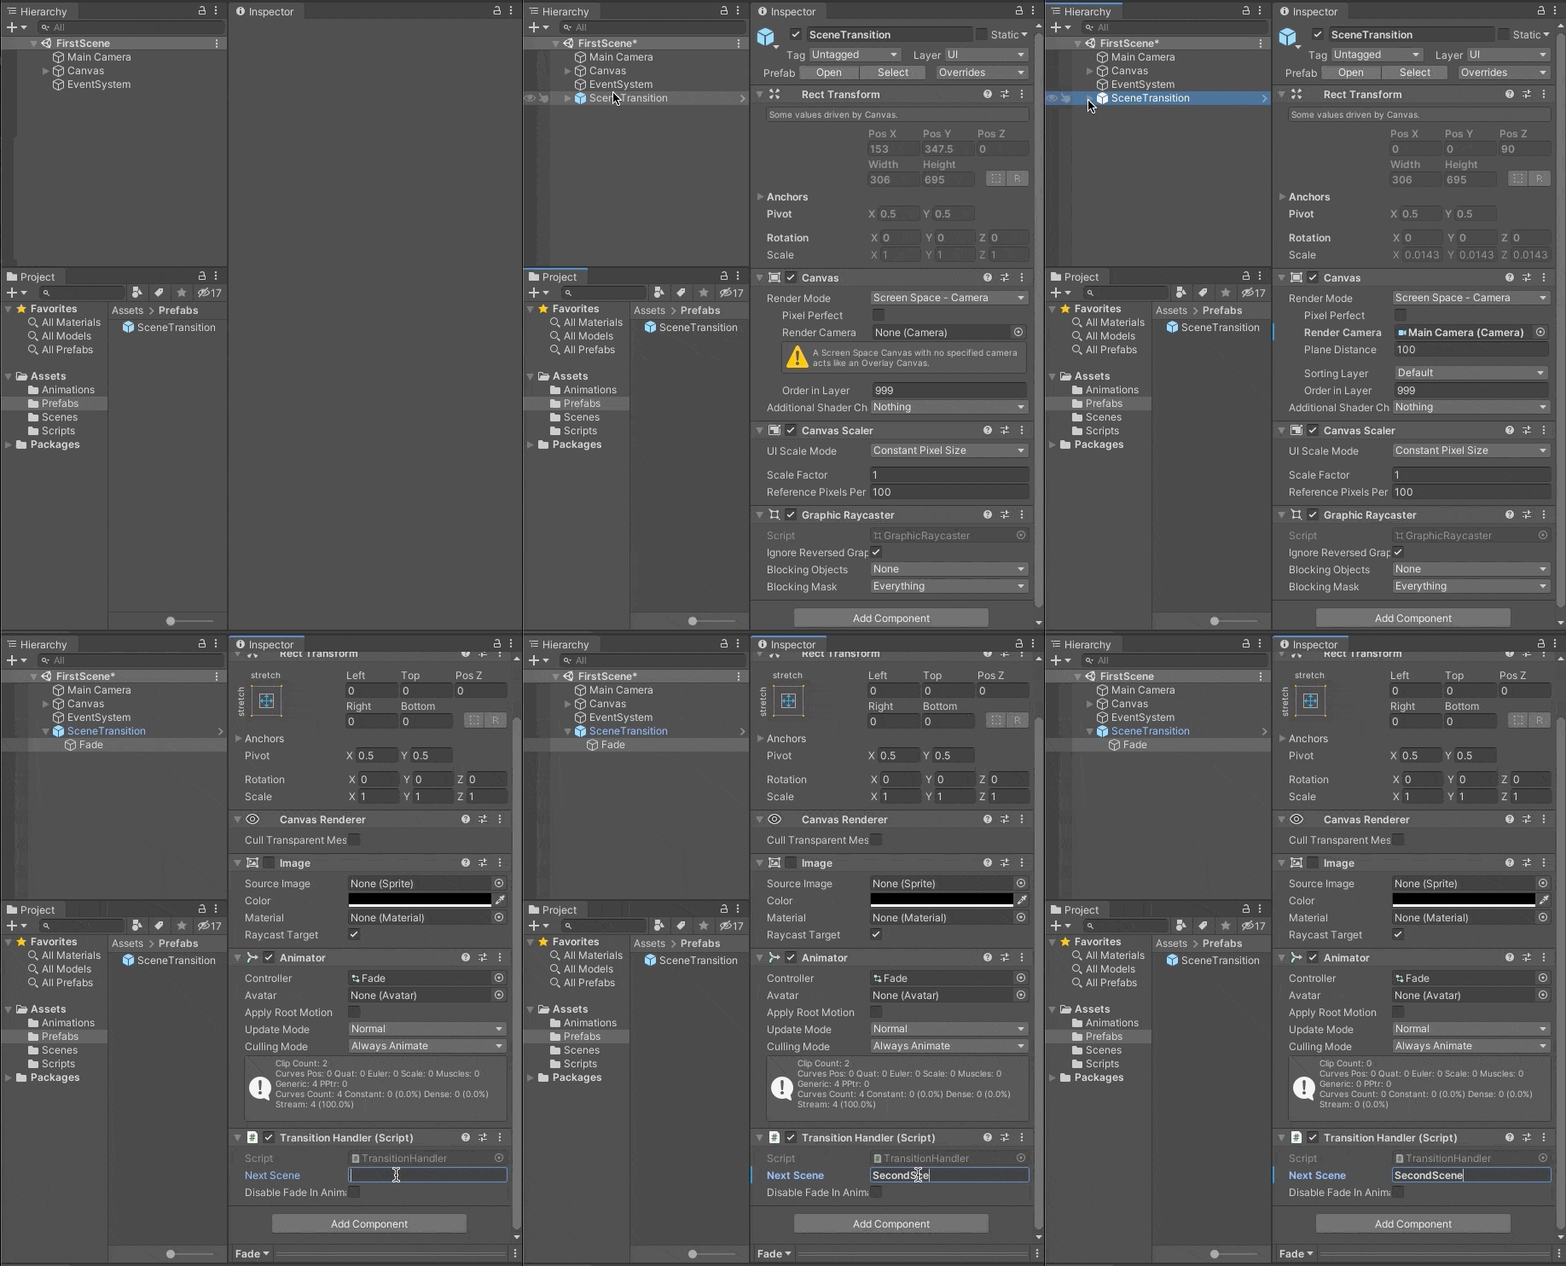
- Add an empty object to the scene and name it
ClickHandler. After that, add a script from step 5. Set upanimator
- Set up
SecondScene. Do all steps fromFirstScenesetup, exclude next scene name; it must be -"FirstScene" - Enjoy the result
Conclusion
After all our manipulations, we got a prefab for transition configuration between scenes. It is unlikely that you will use it for production since the synchronous scene loading used is not a very nice solution. And you also need to fine-tune the transition conditions. Also, you need to think about stopping the game at the time the animation starts. And it is desirable to make the animations themselves more interesting. For example, in Homescapes(Playrix), the transition between loading resources and launching the menu is hidden behind a camera descending along the wall of the house. However, after repeating these steps with your own hands, you should have an idea of how to make the transitions beautiful. See you next time! =)

